In this video, Callum from The HBP Group’s Tech How Team explains how to set up breakout rooms for Microsoft Teams in Office 365. If you prefer to find out how to set up breakout rooms for Microsoft Teams with written instructions, we have included these further down the page.
Step-by-Step Guide
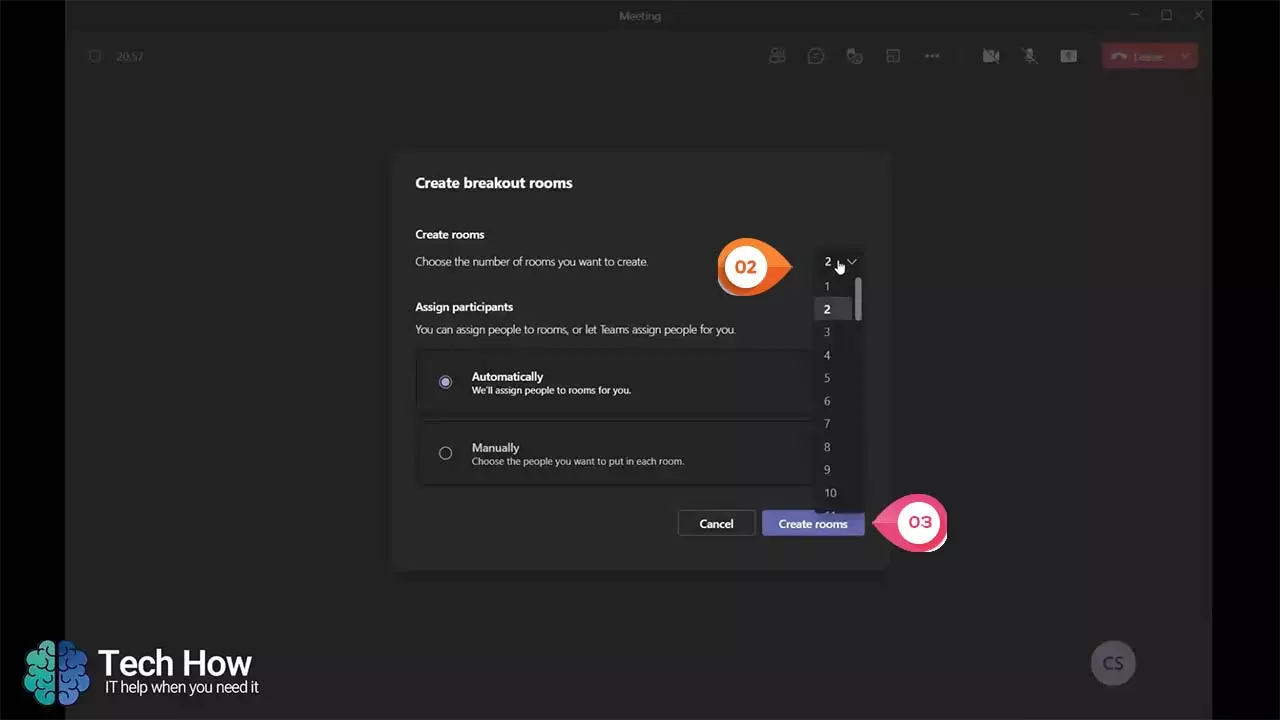
Stage 1: Creating Breakout Rooms
Creating breakout rooms in Microsoft Teams is simple and straight forward. Once you are in a Teams meeting just follow these simple steps.
1) From within a live meeting windows click the “Breakout rooms” icon in the top right of the screen.
2) Choose the number of rooms you wish to create from the drop-down menu
3) Select “Automatically” or “Manually” and then click “Create rooms”.
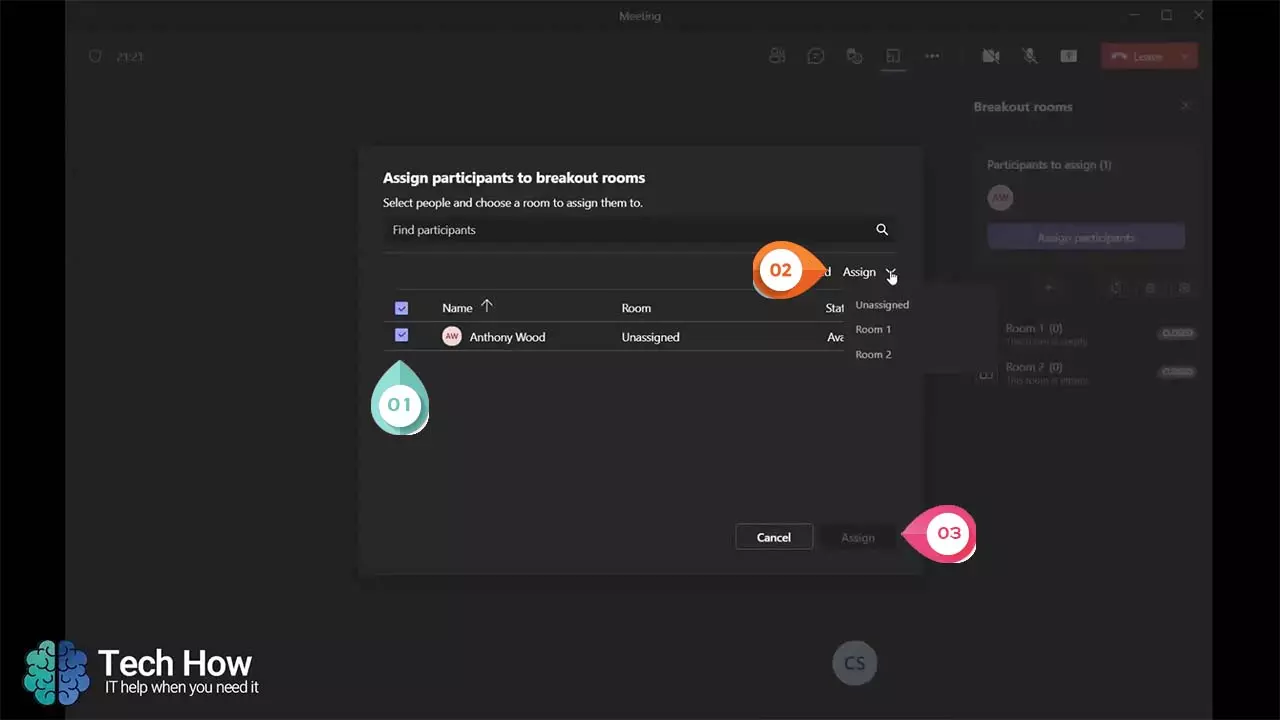
Stage 2: For Manual Room Allocation
1) Select participants you wish to be in a particular room
2) Click on the “Assign” drop-down to select which room the participants go in to.
3) Click the “Assign”.
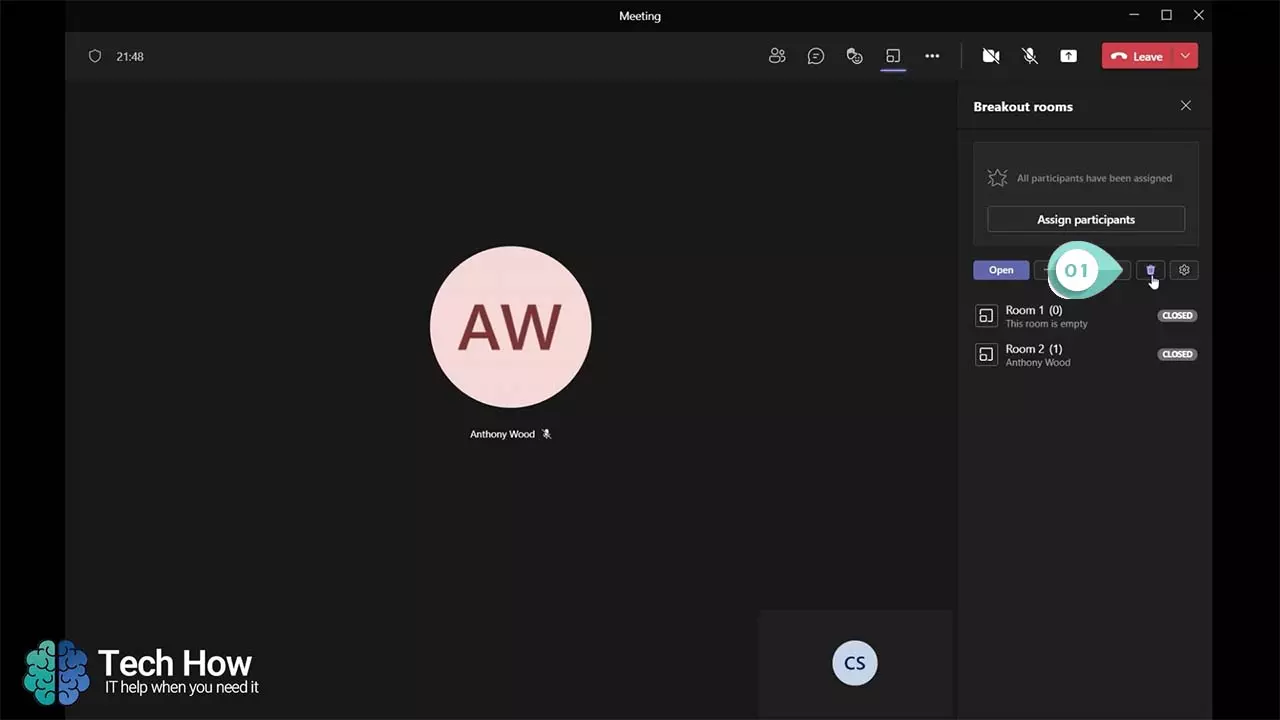
Stage 3: Close Breakout Rooms
1) To close the rooms select the “Remove rooms” icon (which looks like a bin).
2) You will then be given the option to delete all existing rooms, the just click the “Remove” option and everyone will return to the original meeting space.
Request an IT Support Quote for your business
Fed up with the service from your current IT partner? Does your business deserve better? As well as creating helpful content like this for our customers we also provide a wide range of IT support, IT installations and Managed Services for businesses.