In this video, Callum from The HBP Group’s Tech How Team explains how to add and use the planner app in Microsoft Teams. If you prefer to find out how to add and use the planner app with written instructions, we have included these further down the page.
Step-by-Step Guide
Stage 1: Adding The Planner App
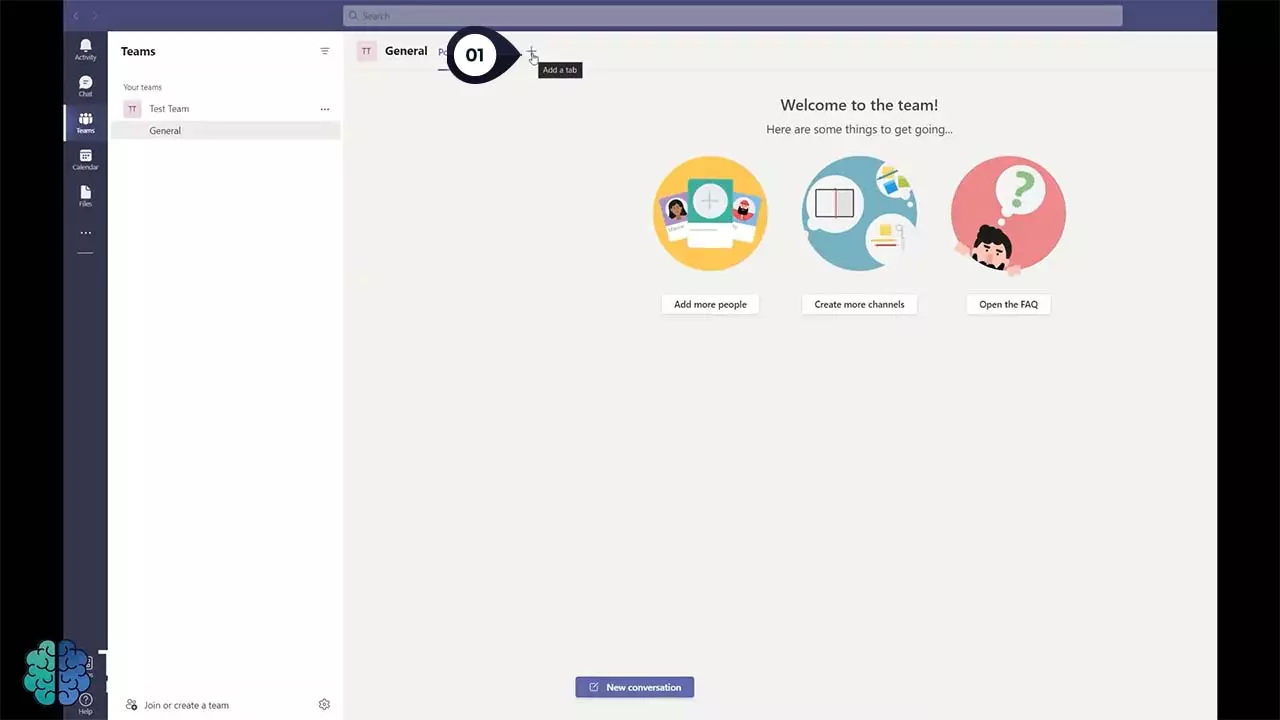
1) In Teams click the + sign at the top of the screen.
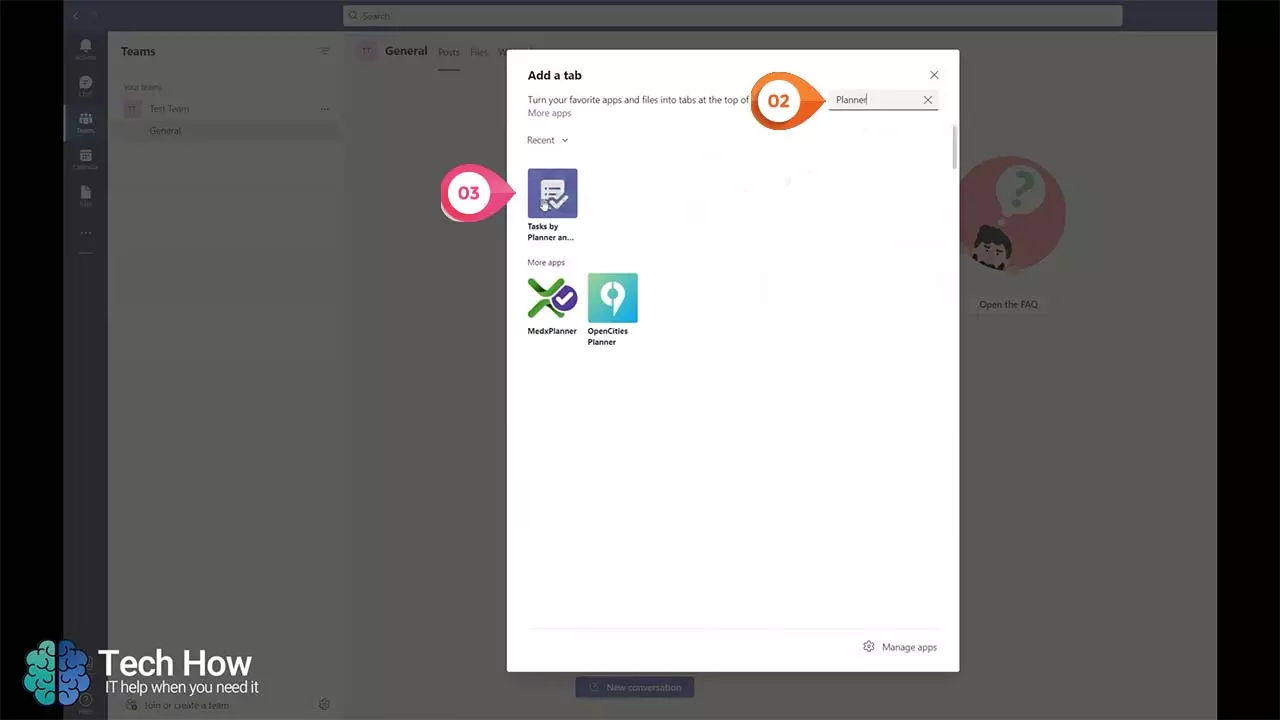
2) In the Add a tab box that appears search for Planner.
3) Click the Tasks by Planner option that should be at the top.
Stage 2: Creating Plan
1) You can now create a new plan.
2) Alternatively if a plan already exists that you wish to use, you can use this option instead.
3) Click Save
Stage 4: Using Planner
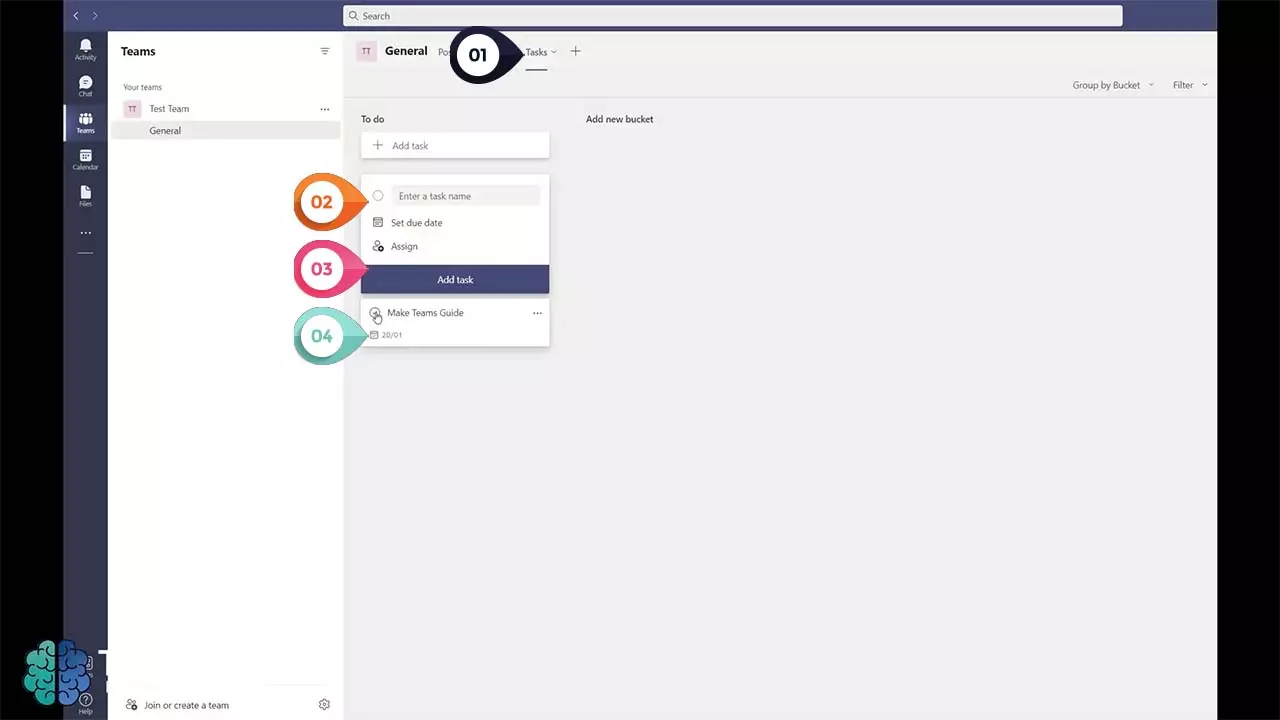
1) The new planner tab will appear at the top.
2) Click + Add task and enter the task name, with a relevant due date and assign to colleagues if required.
3) Click the Add task in the box.
4) The new task will appear below. Click the tick circle next to the tasks name will make it disappear and move to the completed tasks list.
Request an IT Support Quote for your business
Fed up with the service from your current IT partner? Does your business deserve better? As well as creating helpful content like this for our customers we also provide a wide range of IT support, IT installations and Managed Services for businesses.