
Chapter 10: Admin & Accounting
Chart of accounts
Advanced Business Cloud has a unified ledger and therefore all transactions created in the system are live in the accounts module. When transactions are created through the system there are some default transactions posted straight into accounts unlike other systems which wait for a posting run etc.
Because of these default transactions, business cloud will come with a standard chart of accounts. A customised chart of accounts can be imported however the default transactions created by the system are hardcoded to post into specific account codes and would therefore require journals to move them later.
The chart of account is displayed as a parent to child category structure with summary account codes that detail the totals within that parent account. To see what sit within the summary account users can expand selecting the arrow against the account name. Alternatively, there is a show all option at the top of the screen which will open and show all account codes.
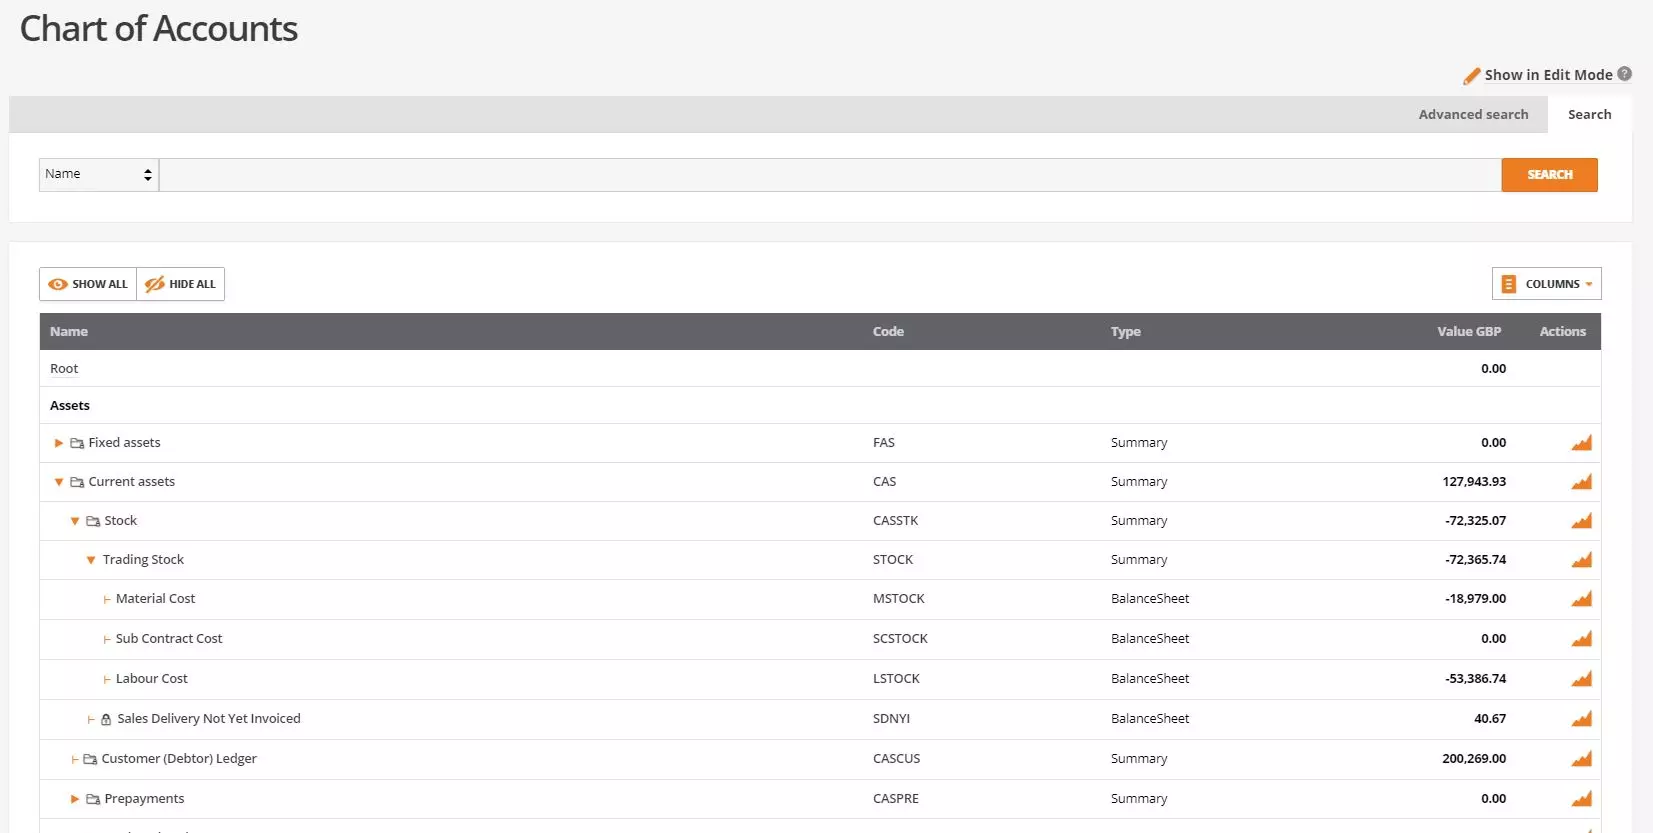
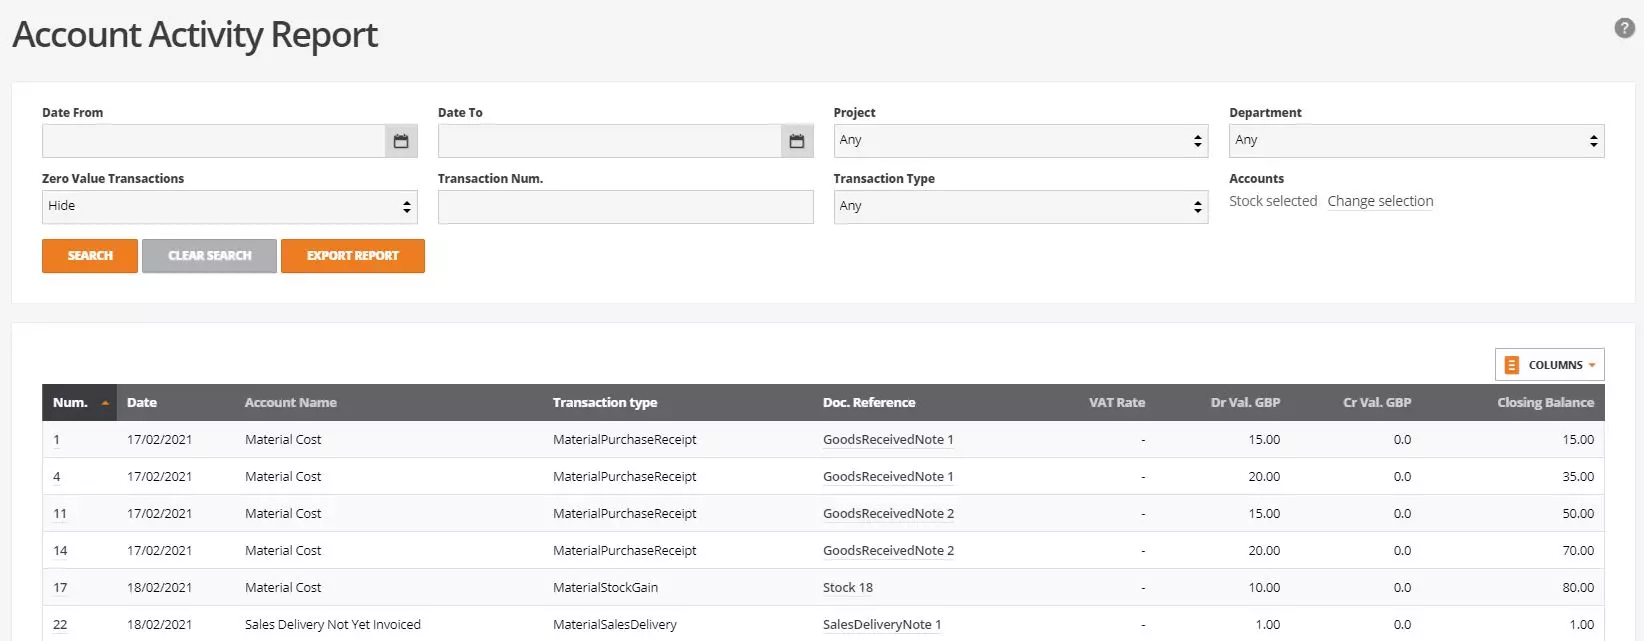
Full account activity can be seen selecting the graph within the actions column against the account code in question. Depending on the account in question depends of the filters and results shows.
Creating account nominal codes
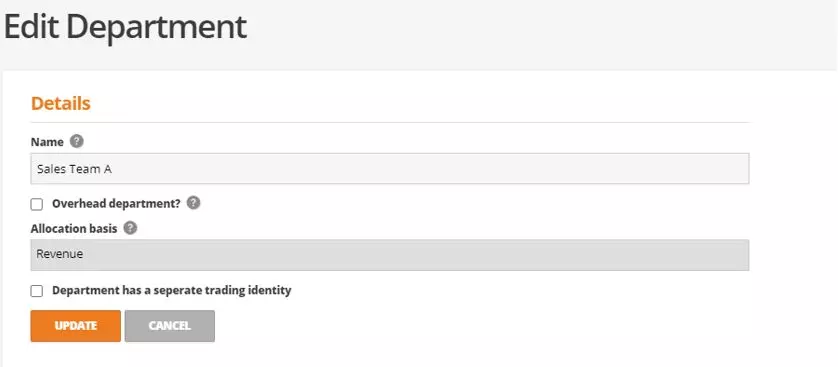
Account codes can be import or created manually from the chart of accounts screen. To create accounts or import account users MUST select ‘Show in Edit Mode’ at the top right of the chart of accounts screen. Under the actions tab users can import the chart of account from a CSV or they can add new accounts selecting the action clog against the account they wish for the new one is to sit under.
When creating new account nominals users MUST confirm the parent account which where the code will sit within the chart of accounts, the account type, account name and code, a description, is it an active account and if it is a budget account.
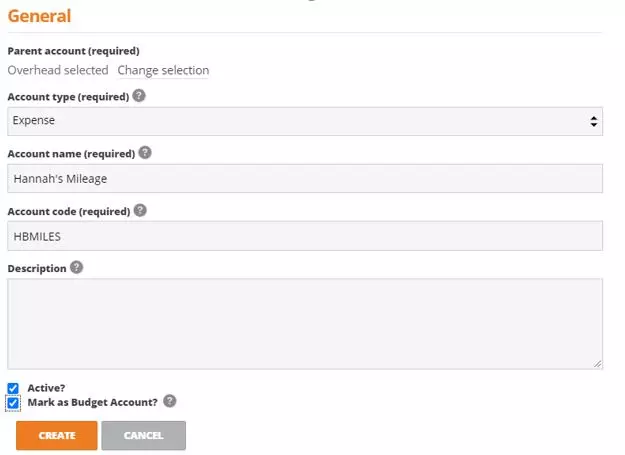
NOTE: If users want to use the budgets feature within business cloud then the account created MUST have the option enabled ‘mark as budget account’ without this a budget cannot be created for the account.
Accounting Journals
Navigate to accounts > journals
Account journals are usually performed as part of a month and year end process to move values from one account nominal code to another. Although business cloud allows users to record default / preferred accounts for transactions there still may be some that need journaling maybe due to error posting or write off’s etc.
Account journals can be created selecting +new at the top of the journals screen. When creating new journals users can select to create a single line journals, multi-line journal or an opening balance journal. Depending on the option selected will depend on the process to follow.
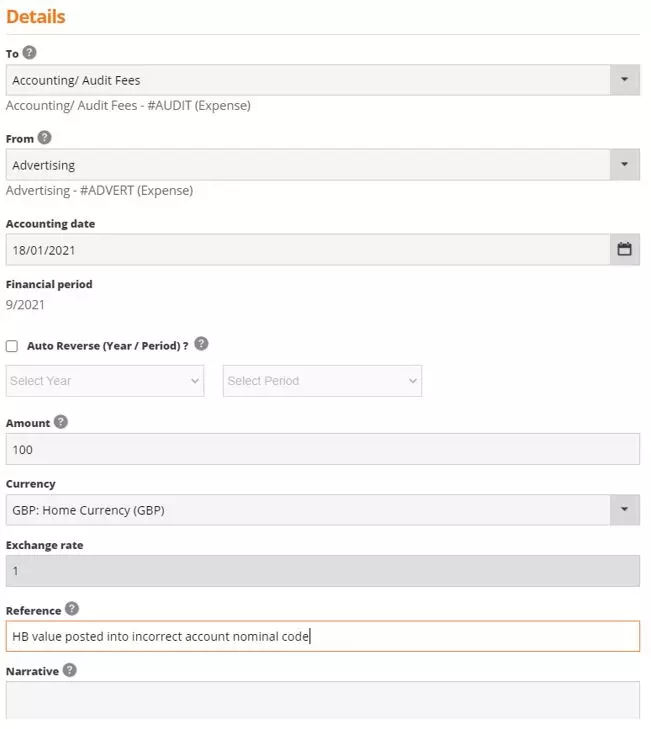
Single line journals: this option would be used if a user needs to move a value from one account nominal to another as one simple, easy transaction. First the users would select the account to journal TO and the account to journal FROM followed by the value being journaled. The currency and exchange rate will be populated as GBP by default however can be changed if required. A reference and narrative can also be recorded and is advised to allow your accountant and / or auditor to see why the journals have been created.
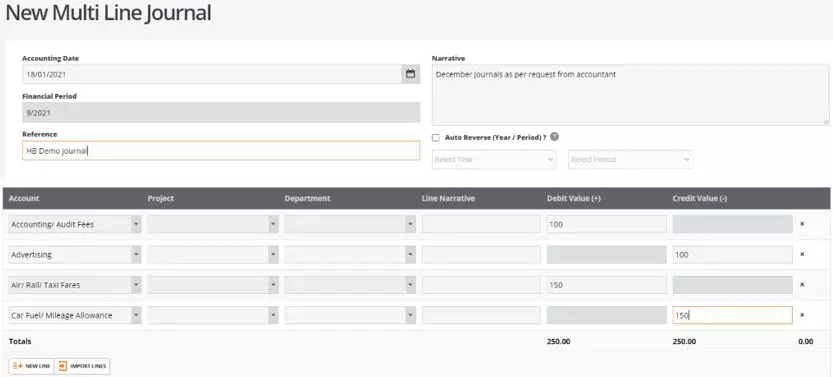
Multi line journals: this would be used when a user has multiple journals to create for different accounts. Multi line journals can be done on screen or imported via a CSV. First detail the accounting details such as date for the journals along with any overall references/narratives. Under this user can add the lines for the journals searching by the account code or name and recording the credit or debit value.
Multiline journals can be imported from a CSV, select +import lines to upload journals from a CSV. This is particularly useful if there are set journals to be recorded each month or if an accountant advises journals to be recorded. The CSV file MUST follow the template and have all required data populated else it may fail to import.

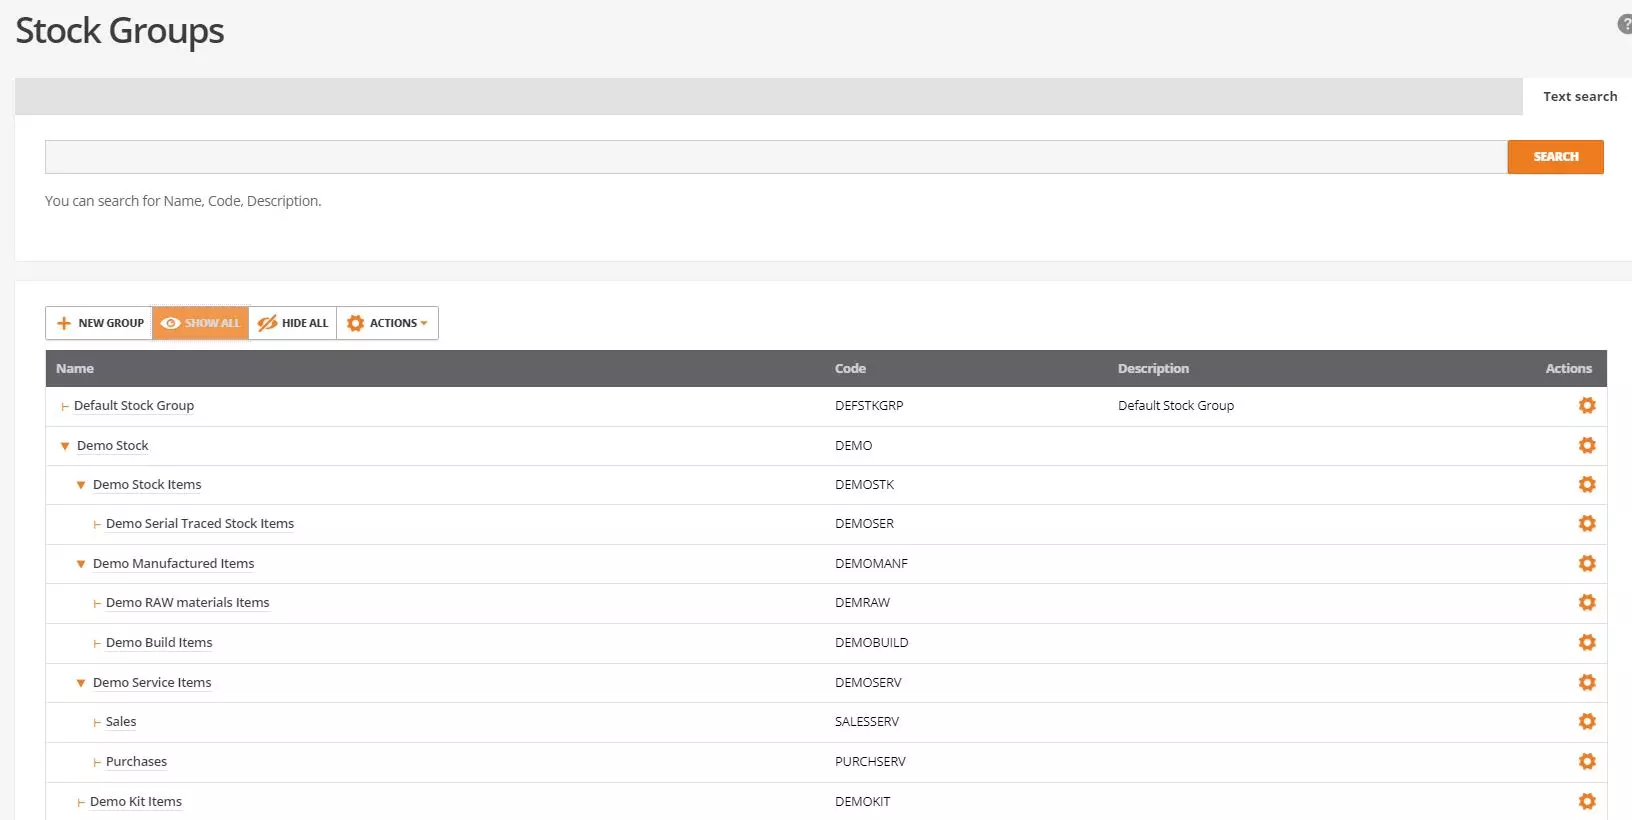
Stock Groups
Stock groups can be created in business cloud to allow users to group stock record together and set up defaults for where abouts transactions post to within the chart of accounts. All stock groups created in the system will show on the stock groups screen in the same format as the chart of account whereby they are split into parent and child categories.
To create a new stock group, select +new group at the top of the stock groups screen. Assign the group a code and name, both fields are mandatory. Next if required linked to an already existing parent group. If this is left blank, then the newly created group will stand as its own parent group.
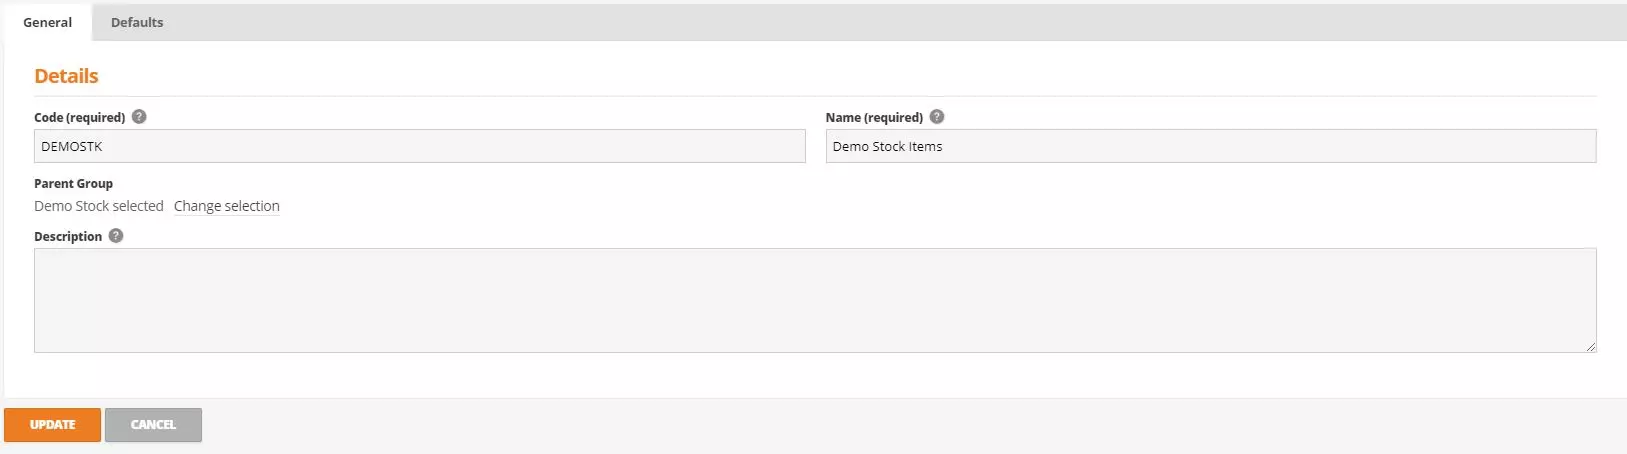
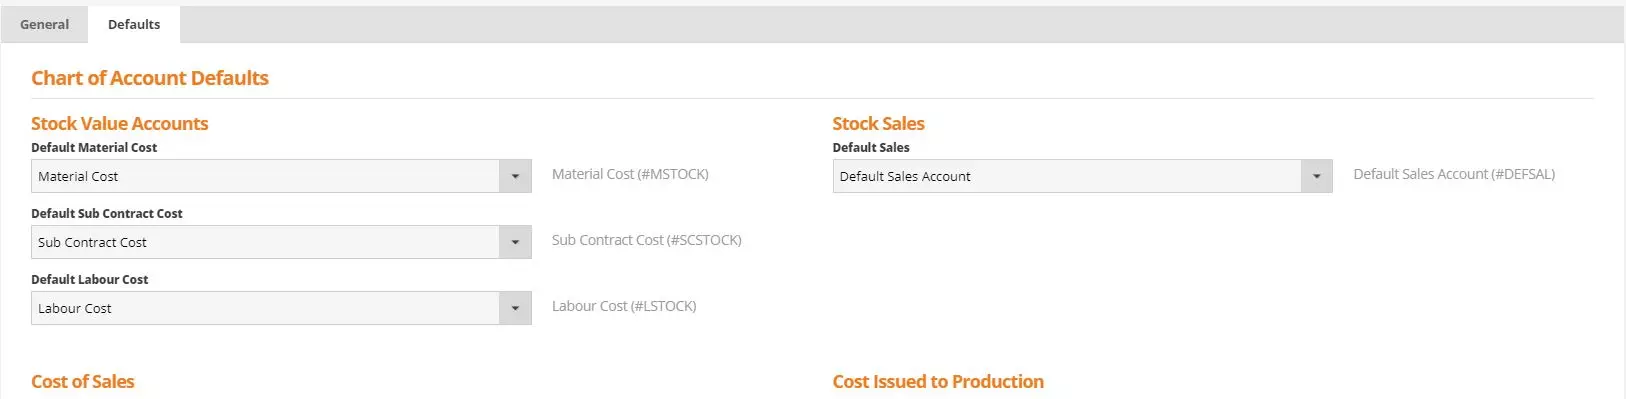
Under the defaults tab users can assign specific account codes to the stock group. This will then become the default account used whenever transactions are created for items linked to the group. If left blank the system default account codes will be used, these are shown in grey against each transaction type.
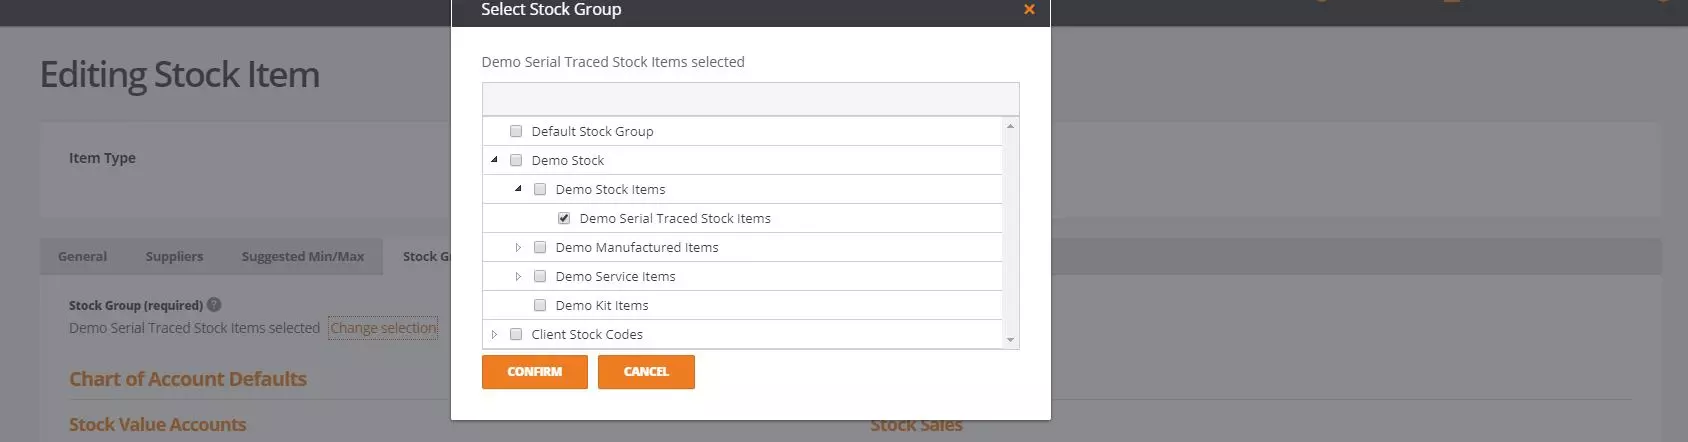
Once a stock group has been created it can be applied to a stock item from the stock record or via a stock import. Navigate to stock & Order Items then select actions and edit against the item in question. Under the stock group tab select change selection and select the group to use.
Assets
Asset parent codes are created by adding new account nominal code under the asset’s sections of the chart of accounts.
Once the asset parent codes have been created, asset item and purchases can be recorded. Assets in business cloud work differently to other accounting system. Under the accounting module there is an assets screen that allows all company assets to be recorded along with their values. This screen would overtime become your company asset register. Similarly, to the chart of accounts and stock groups screen the assets will display in a parent to child format so you can see a total value of assets within a group but also the individual value of your asset items.
Asset Purchases
Whenever a new asset is purchased this must be recorded in the system as an asset purchase. Navigate to the assets screen, select +NEW followed by new asset purchase. The Purchase invoice screen will load for users to populate with the asset purchase details.
The invoice is split into 3 sections. General, Order items and document notes. In the general section select the supplier of the asset, a new supplier account can be created from here if required selecting (new) next to the supplier field. Account information will be prepopulated as per the supplier account.

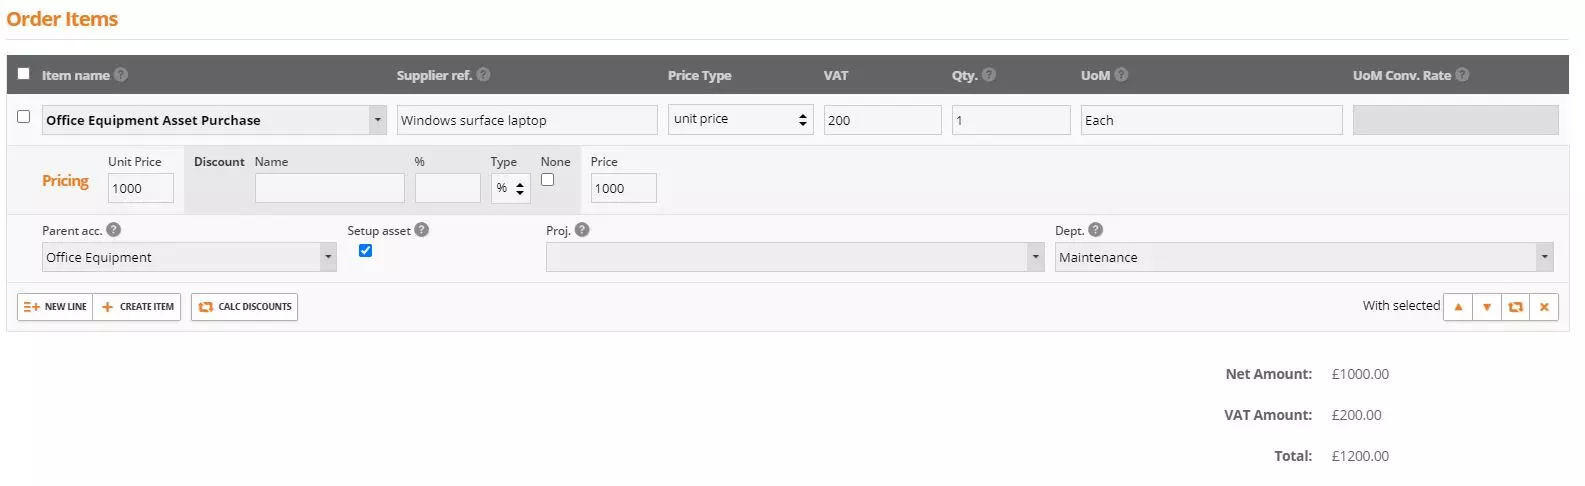
Asset order items MUST first be created to allow users to add them to asset purchase invoices as an item line allowing them to record the supplier reference, VAT amount, QTY purchased, UOM, Price, linked projects and / or departments. The asset order items are only used to record the purchase, no Qty’s will be recorded against them, they are purply for reference only. Once the item line has been added to the purchase order, users can select the parent account which relates to where in the account it will sit and they can also select to create the asset once the invoices is saved.
Once the invoice has been saved, the asset item will be added to the asset register and can be set up allowing users to record the serial numbers, location, the type of asset, economic life, automatically or manually calculate depreciation and if required record a description.
NOTE: If ‘set up’ is enabled against the item on the purchase invoice then the asset item will automatically be created and added to the asset screen with works in process disabled meaning depreciation will be calculated automatically.
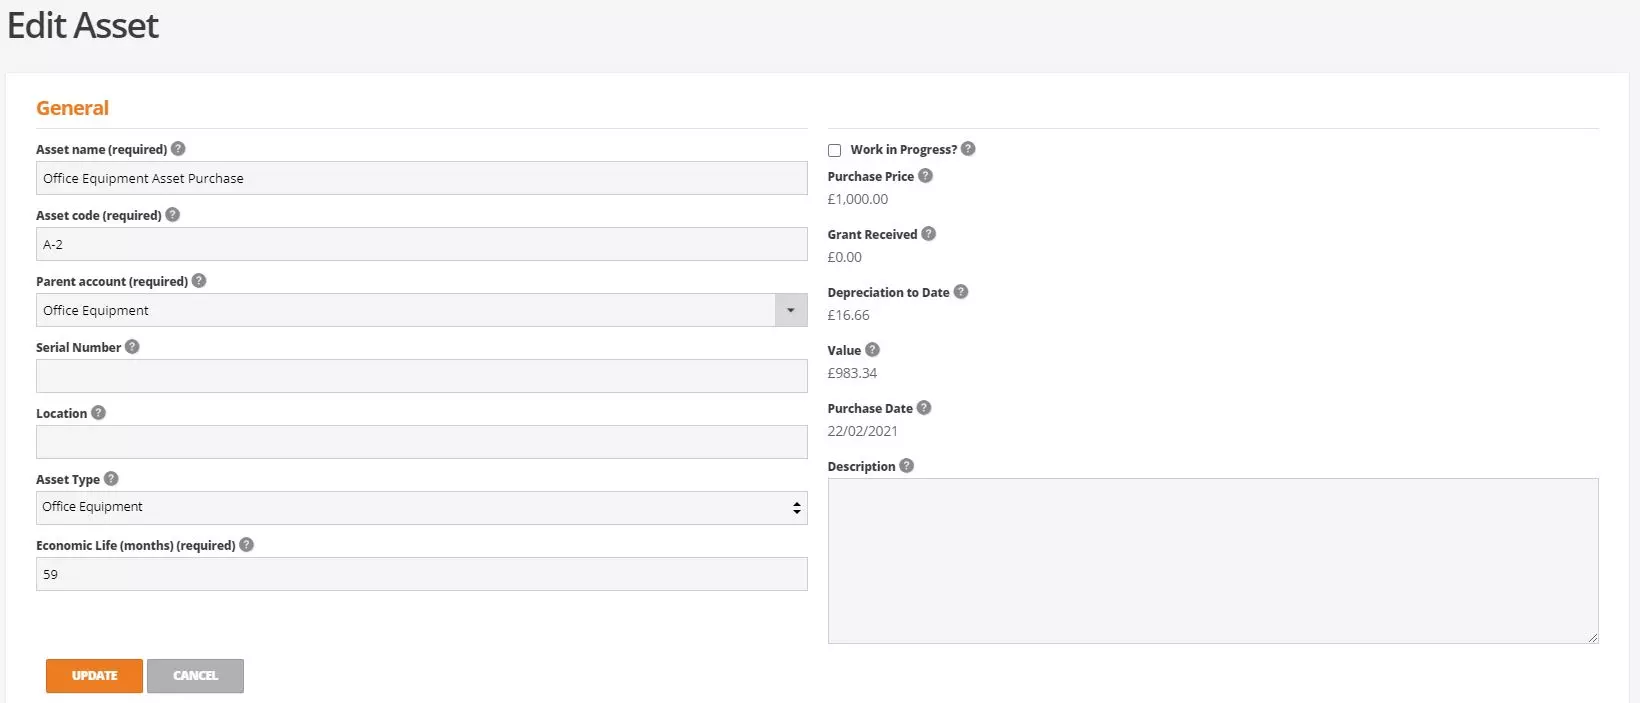
Once an asset has been created in the system it can never be deleted.
Finance Agreements
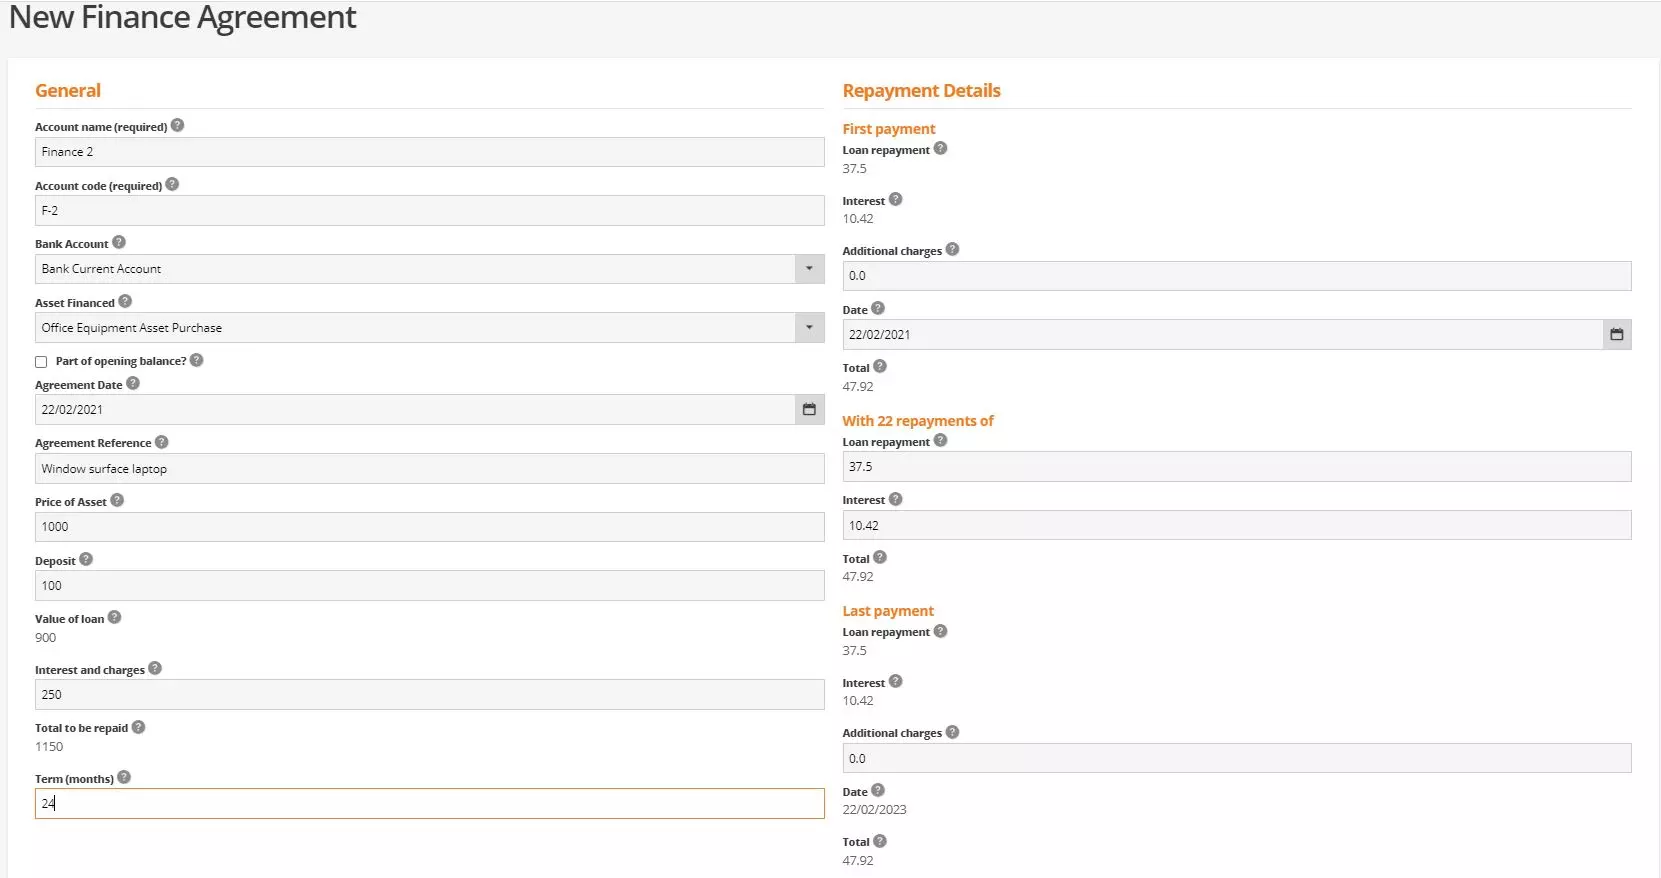
If an asset has been purchased as part of an agreement, then the above steps MUST first be followed to create the asset and then a finance agreement can be set up in the system
Navigate to Bank > finance agreement > + New Agreement
The agreement record is split into two sections, General and repayment details.
Under the general section record all known details for the agreement. We advise to have your finance agreement documents to hand when populating this as once agreements have been created, they cannot be edited or deleted so the data recorded MUST be accurate.
The repayments details will be populated automatically as per the details recorded under the general section. Confirm first payment amounts, repetitions and last payment amounts match your finance agreement documentation.
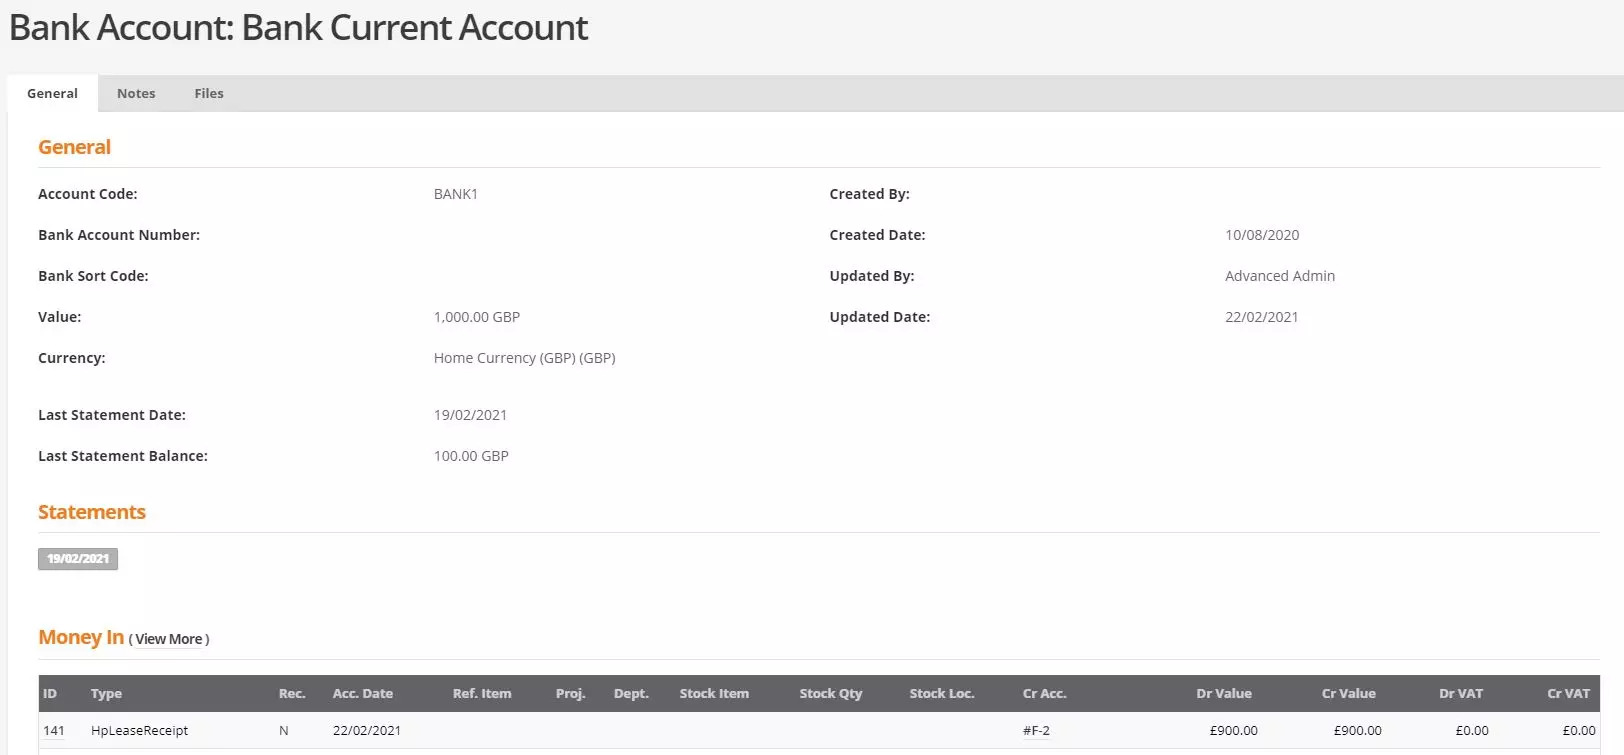
Once a finance agreement has been created a HP lease receipt will be posted into the selected bank account and a recurring payment record will be created each month when due.
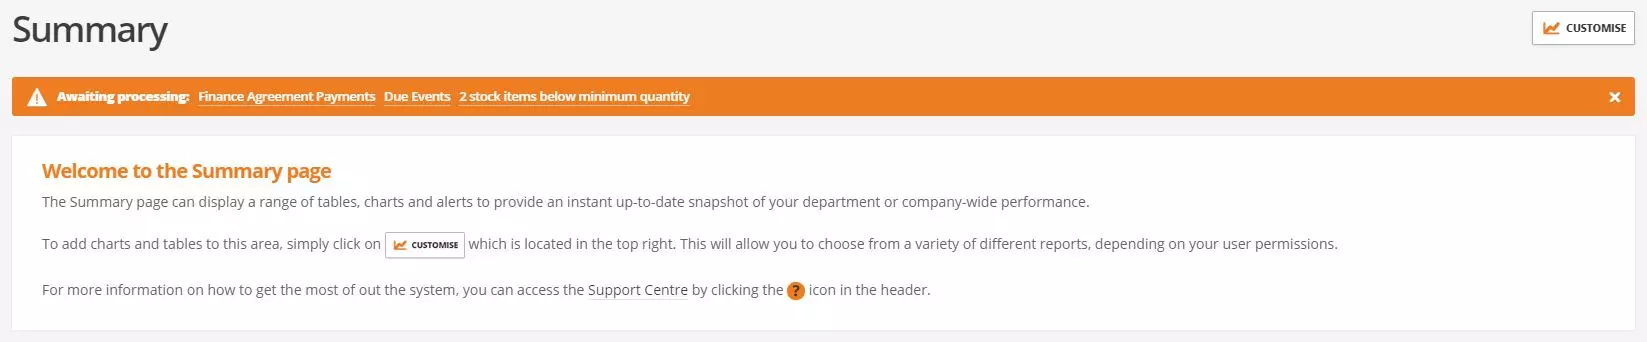
When payments are due a notification will display on the summary screen as below
Financial Reporting
Within business cloud there are several financial reports that can be run to give you an overview of your accounts and financial position. All financial reports sit under Accounts > Financial Reports.

Simply select the report you want to run, this will display on screen where you can filter the results, print and export to excel.
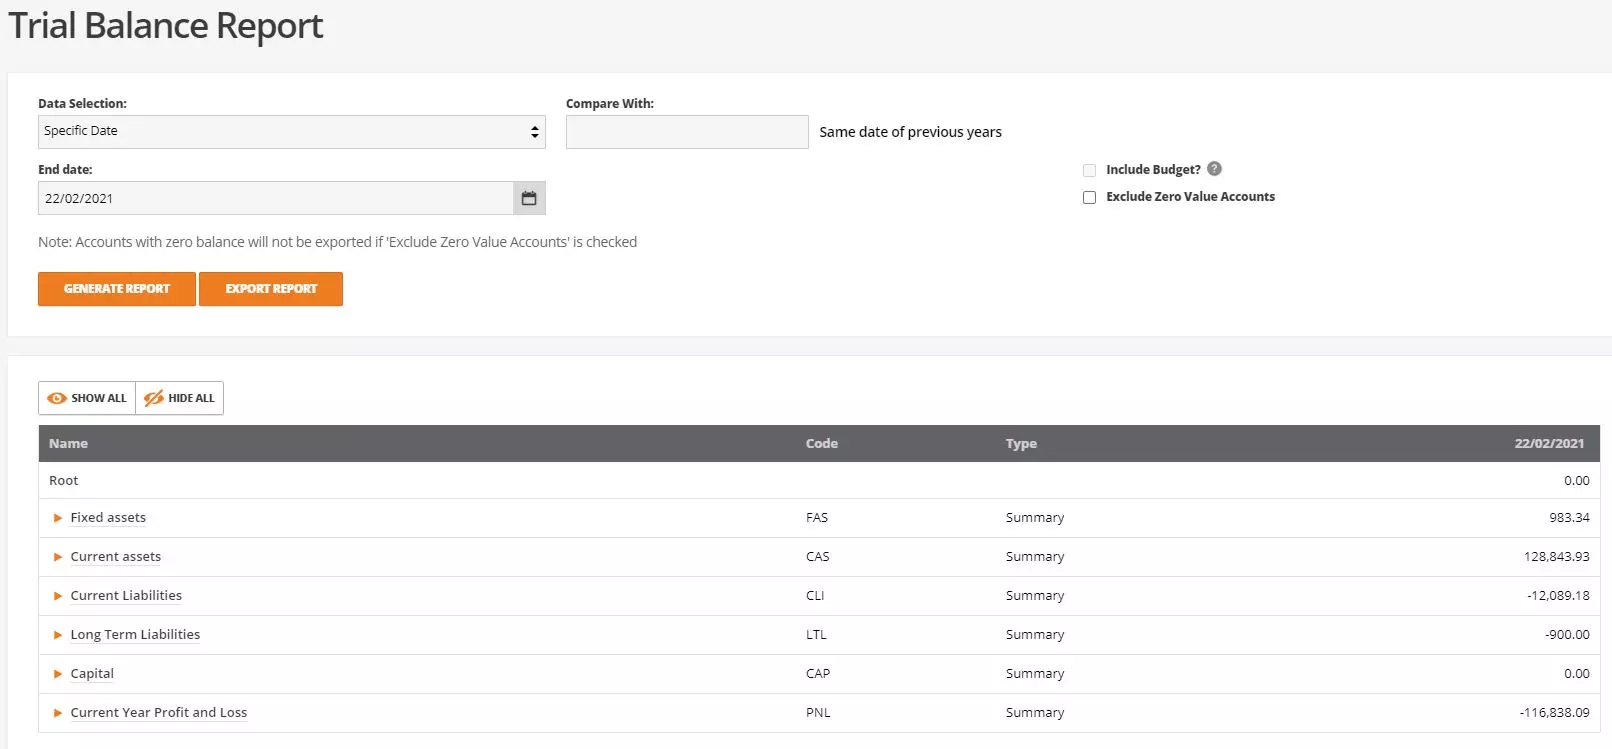
Because business cloud is a unified ledger, and the chart of account has a parent to child format some of the reports may look different to other systems. For example, the Trail balance report will display the summary account codes and values as well as the account nominal code and values. All values are shown as (+) which is DEBITS and (-) which are your CREDITS
VAT Return
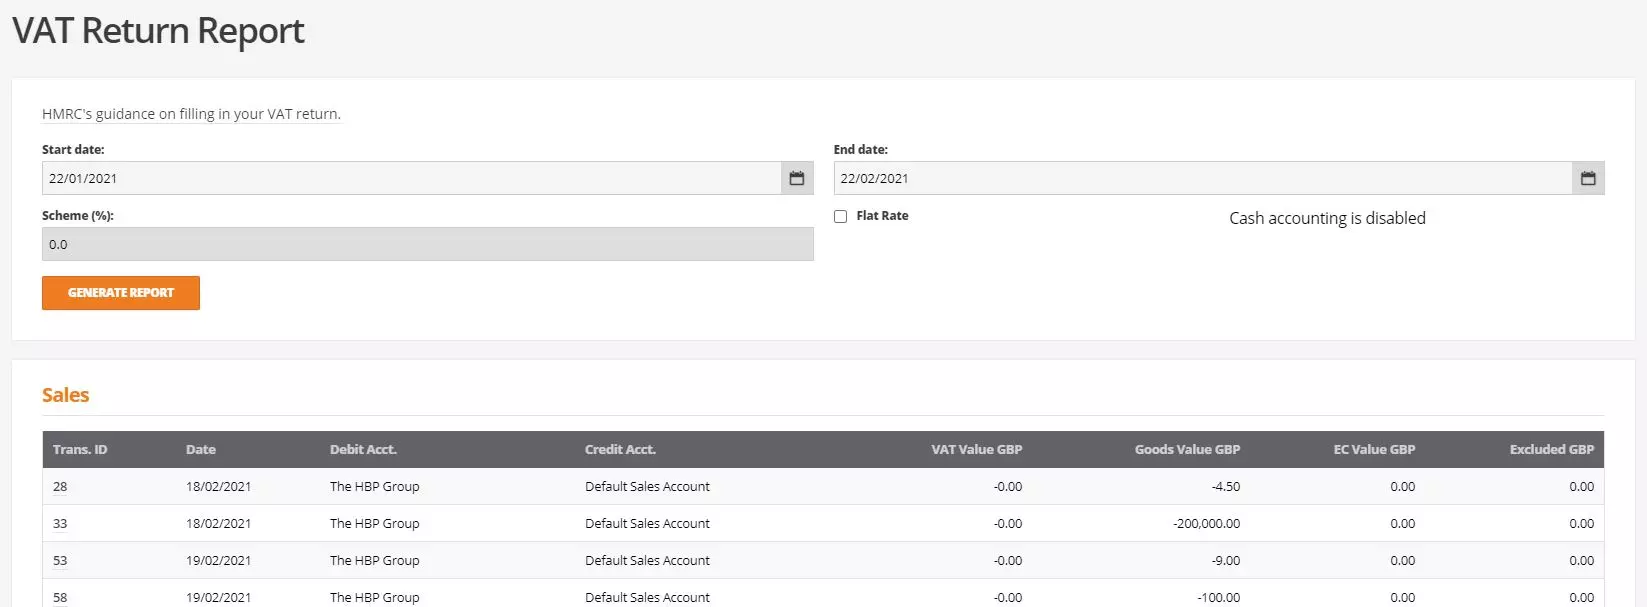
Navigate to Accounts > Tax Reports > Create VAT Return
We advise the VAT return to be done by or with the advice of your accountant. When selecting the VAT return report, the start date and end date will default to today however this can be amended by selecting the dates you want to run the report for. Once you have selected the report criteria select generate report which will show a breakdown of your sales and purchases
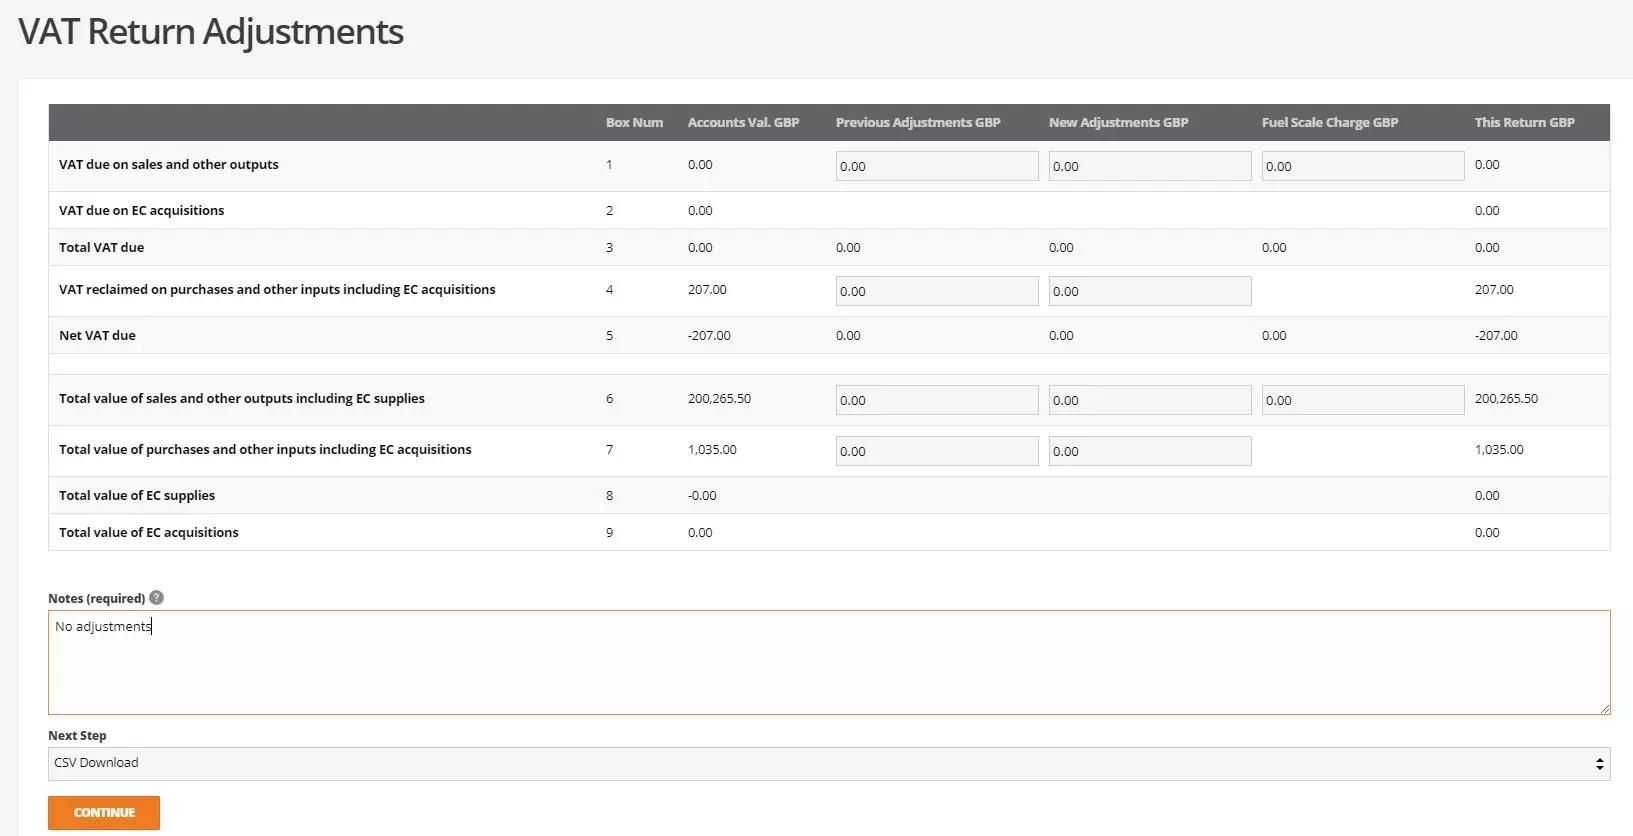
At the bottom of the VAT return users will be presented with the 9part VAT return
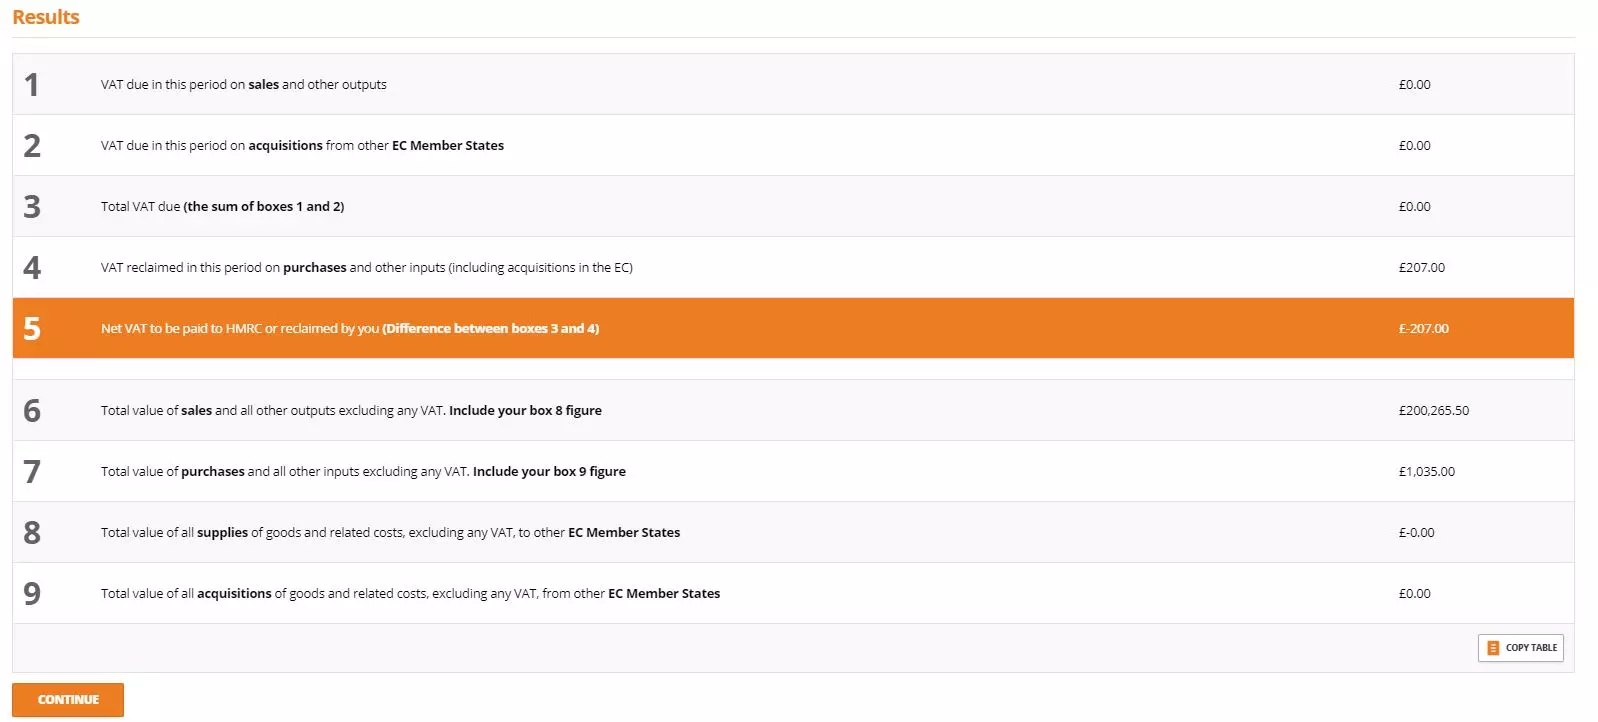
Once you are happy with all figures click continue. The system will pop up with a notification at the top of the webpage asking you to confirm you want to process the VAT return. Select OK. (THIS CANNOT BE REVERSED)
The VAT adjustments screen will load for you to make any required adjustments. If you do make any adjustments to the VAT return you MUST details the changes in the notes field as this is a mandatory field, if not adjustments have been made ensure you state this in the notes. Under the next steps select how you want to process you return, business tax portal, manual submission or CSV download.