
Chapter 11: Employees & Payroll
Employee Accounts
Payroll is a licensed feature and MUST be activated on your license by support. Any recorded created or edited within the employee sections MUST only be completed by an accountant or payroll employee.
Create Employee Accounts
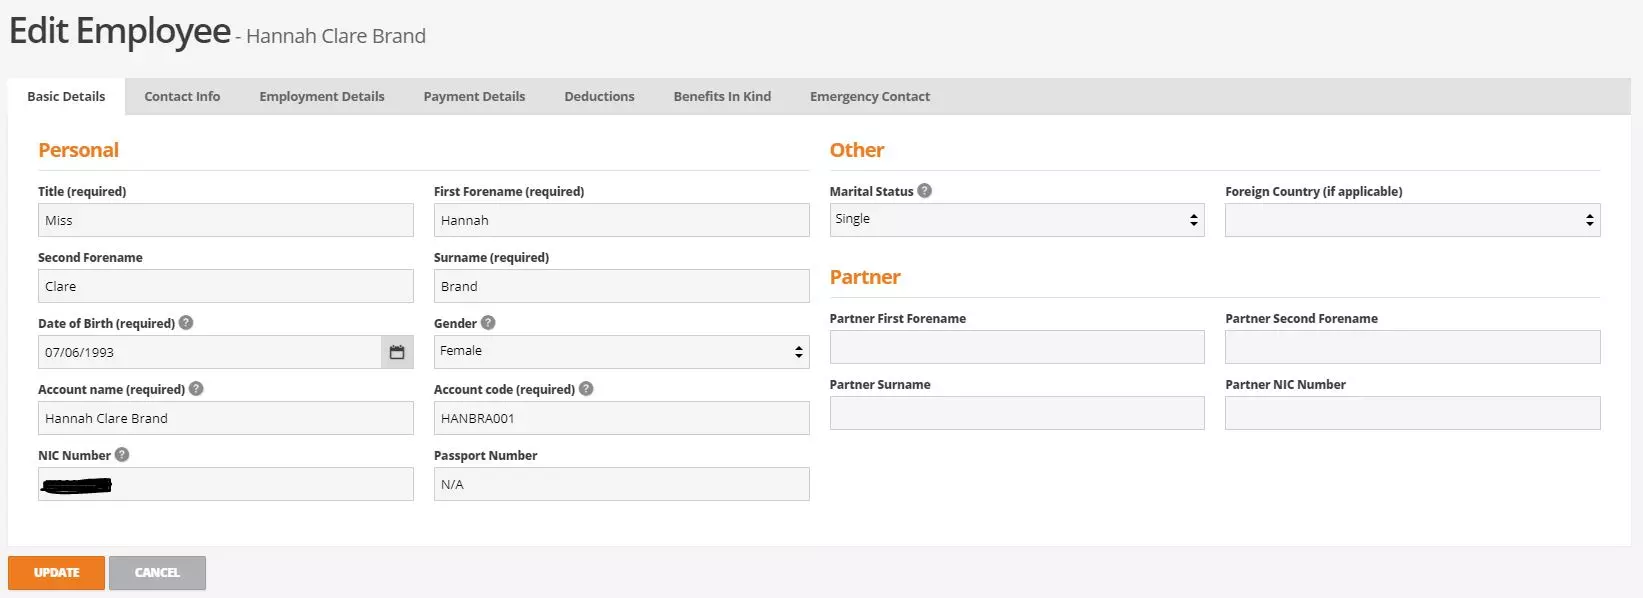
To create an employee account in business cloud, select +new at the top of the employee accounts screen. The employee account record will display with 7 tabs across the top including basic details, contact information, employment details, payment details, deductions, benefits in kind and emergency contact.
Work though the basic details tab recording all known data. Some fields are not required however the more you populate the more you will get out of the system. Under the contact tab record any contact information known for the employee, the email address here will be the email payslips are sent to if the employee has their preferred contact type as email.
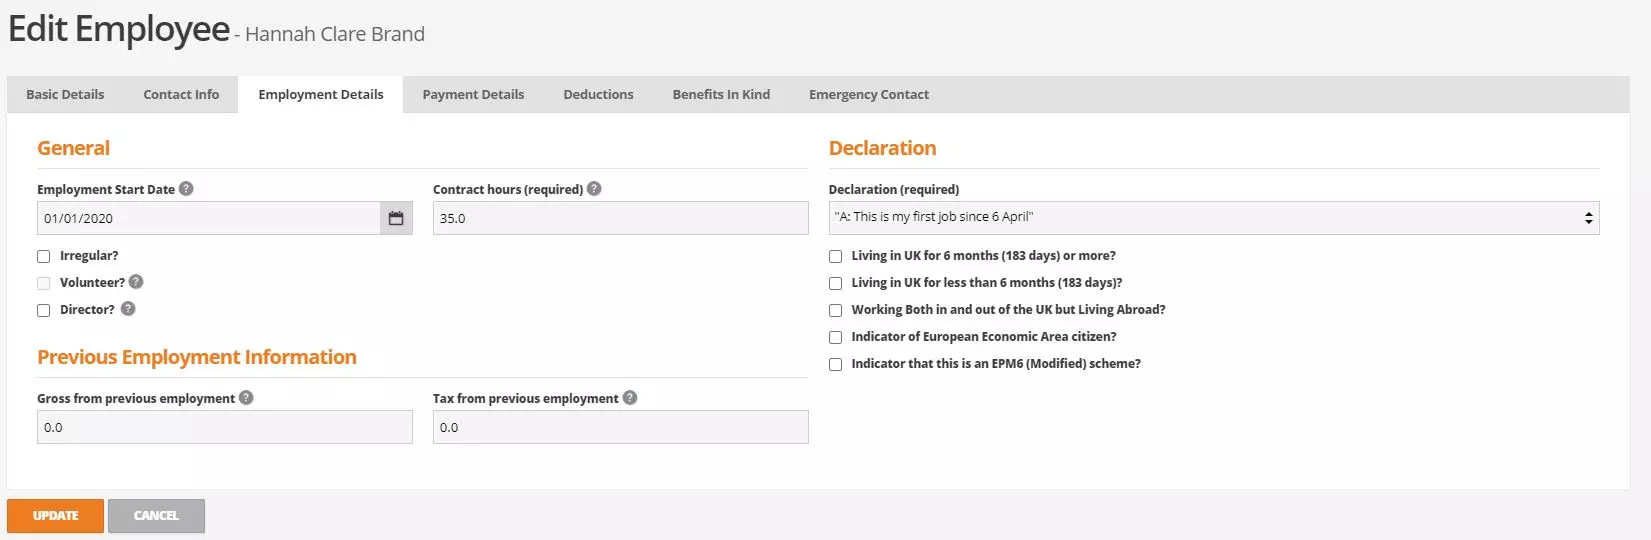
Under the employment details section record all known details including the start date, contracted hours, previous employment details etc. This MUST be completed by your payroll administrator or accountant.
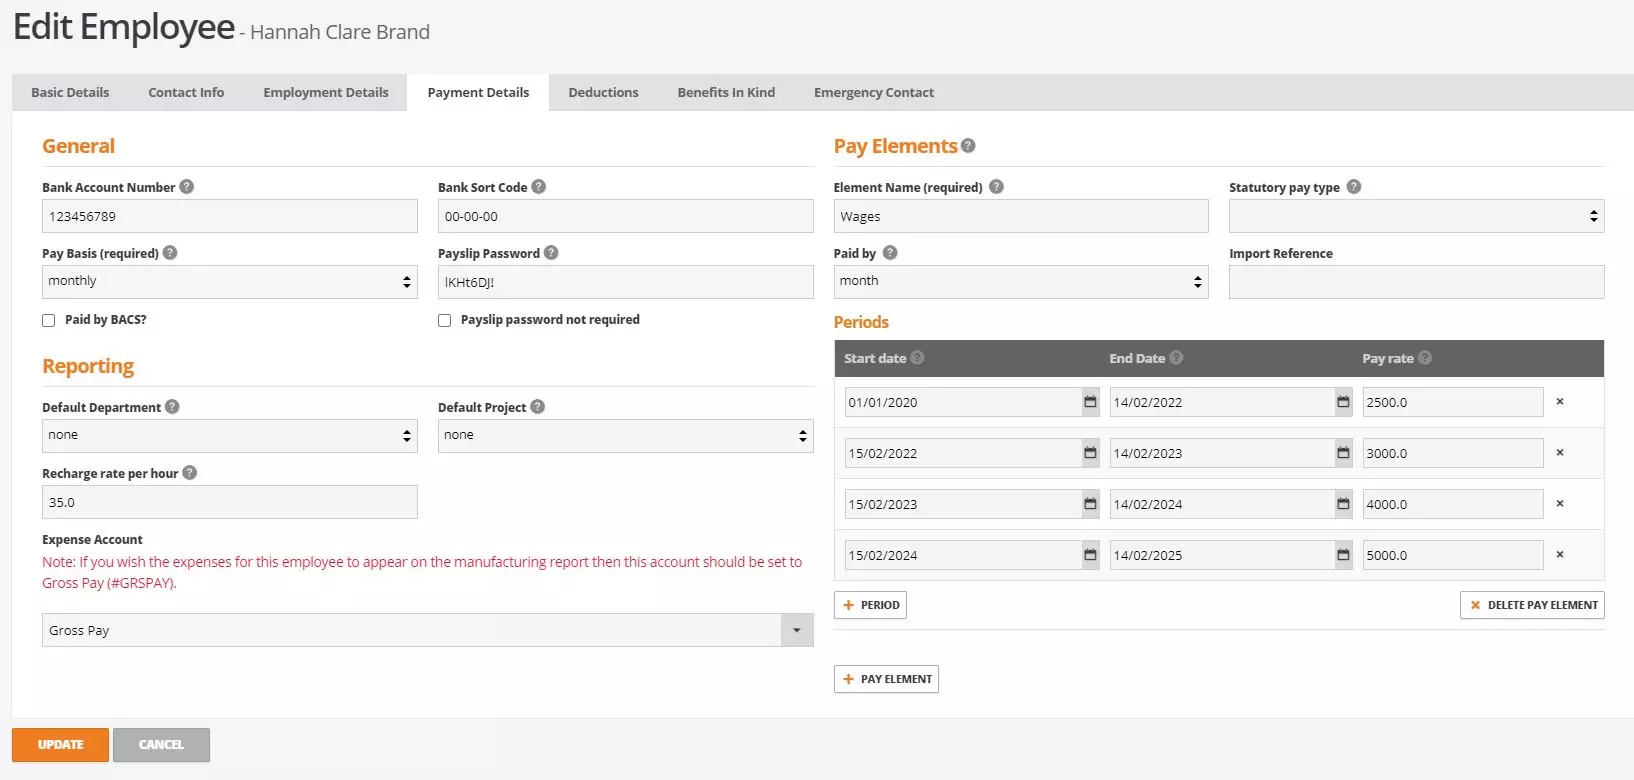
The payment details tab MUST also be recorded by the payroll administrator or accountant. Populate all know payment details including bank details, linked departments, and recharge rates etc. Under the pay elements section record all payment types that can be applied to this employee’s payslip. This should include things like basic rate of pay, sick pay allowance, overtime rate, maternity pay rate etc. Within each pay element specify the valid period. This will only be able to be used within that period, if the period passes and you attempt to use the element it will pull through on the payslip at £0.
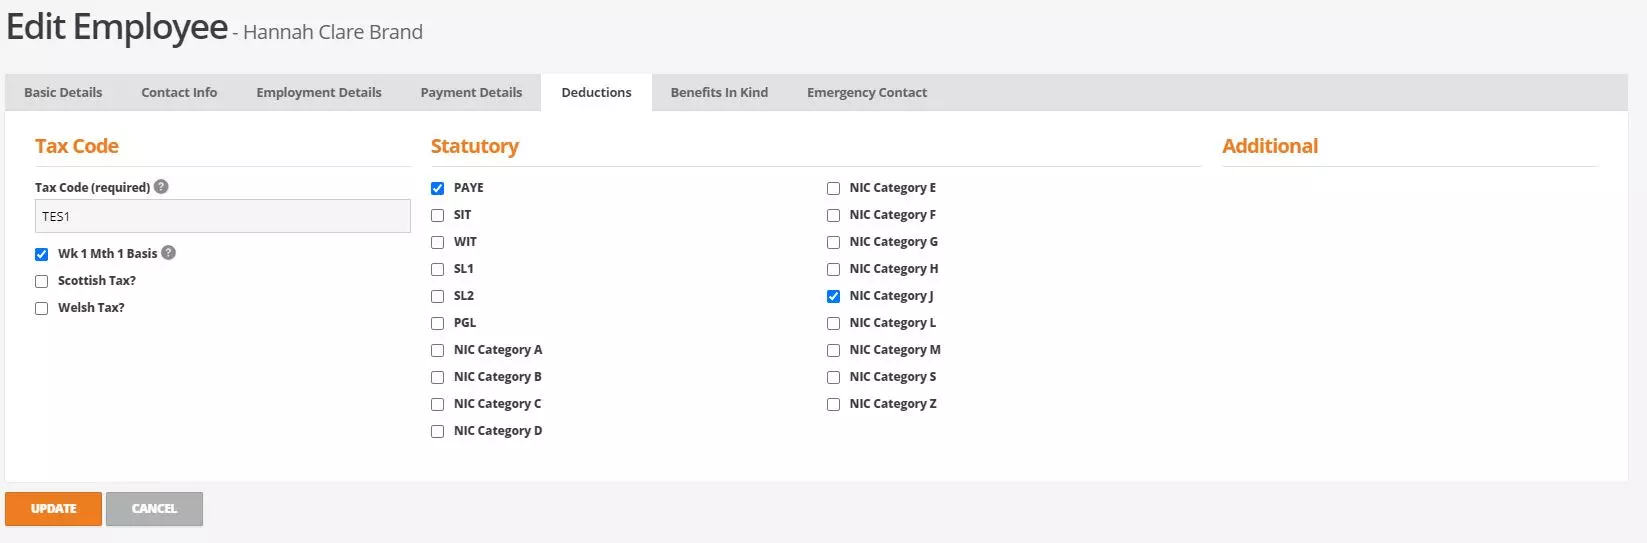
The deductions tab will list all standard employee deductions however there is an additional deductions section where you can select additional deductions if they have been set up in the system. To create deductions please see the ‘create deductions’ section of this guide.
Under the benefits in kind section add any cars for the employee account and finally record the employee emergency contact details. For record purposes only.
Employee Hours
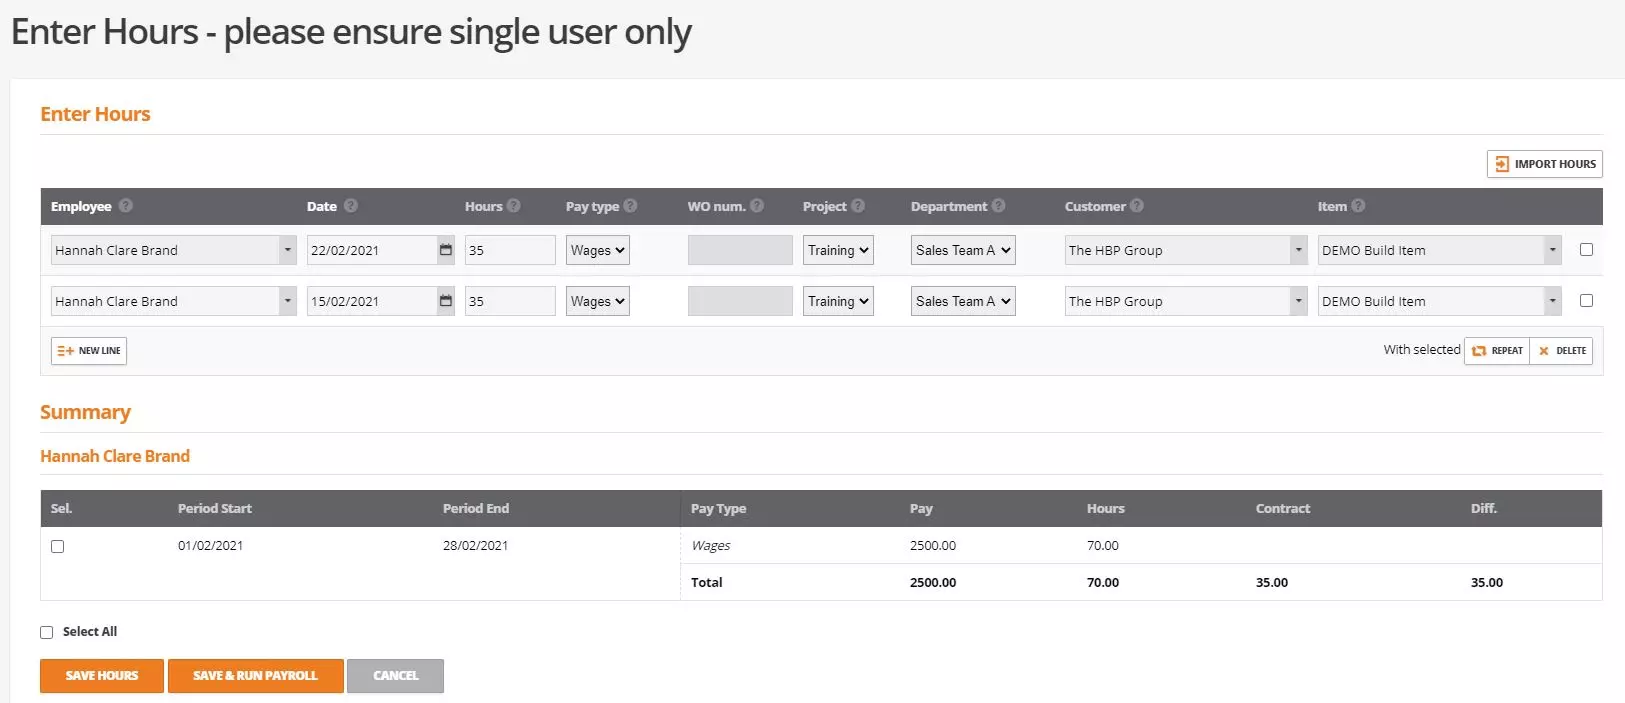
To create a payslip for your employee and run payroll, employee hours MUST first be recorded. Hours can be added manually or via a CSV import. How hours are recorded for your company may differ from the examples shown in these screen shots. Confirm with your payroll administrator or accountant.
To record hours navigate to employees, enter hours and select +new line or import hours. Search for the employee by name or code and detail the date, hours, pay type, linked works order number, linked project, linked departments, linked customer and linked item to be charge and / or have the cost recorded against. Multiple employee hours can be entered at one time and as they are populated a summary grouped by employee account will show below.
Running payroll
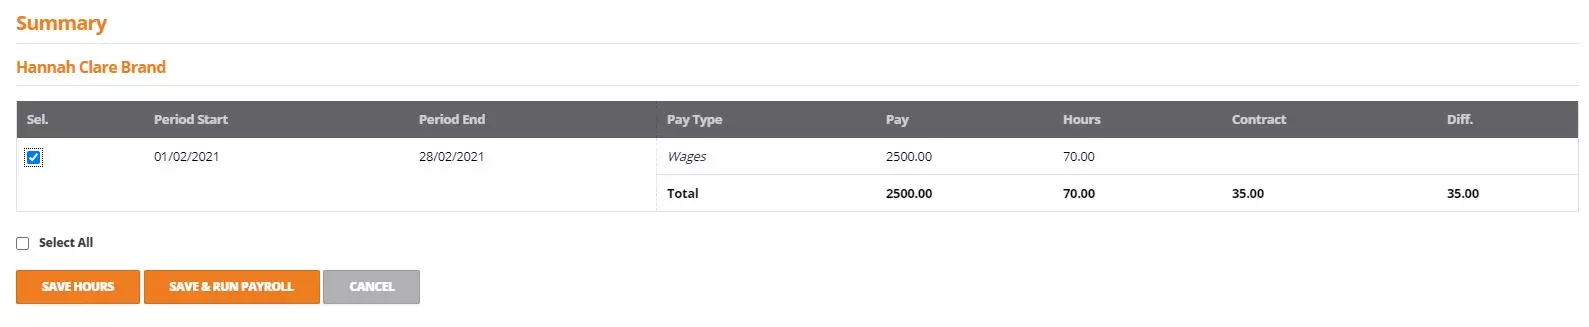
Once hours have been added the employee summary will display where users can then select which accounts, they want to run payroll for. This MUST be completed by a payroll admin user or accountant.
Once selected to run payroll the employee payslip will display on screen for you to confirm before saving and processing the payroll. At this point if there are any errors you can cancel and rerun payroll however if payroll is processed it cannot be reversed.
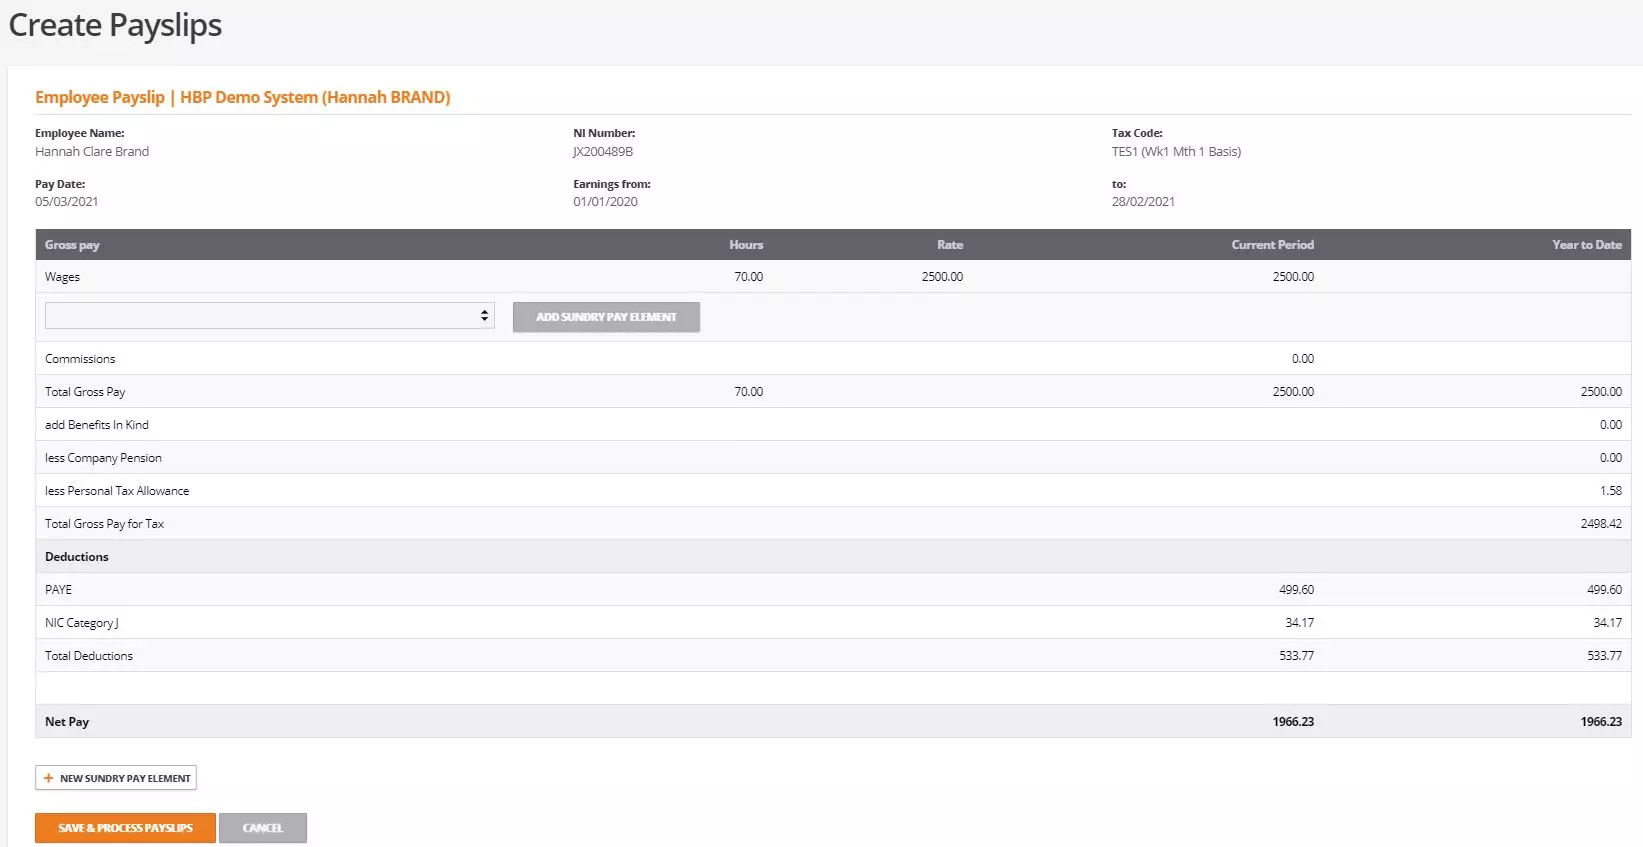
Any time payroll is processed the outstanding FPS screen will display to submit payroll details to HMRC.

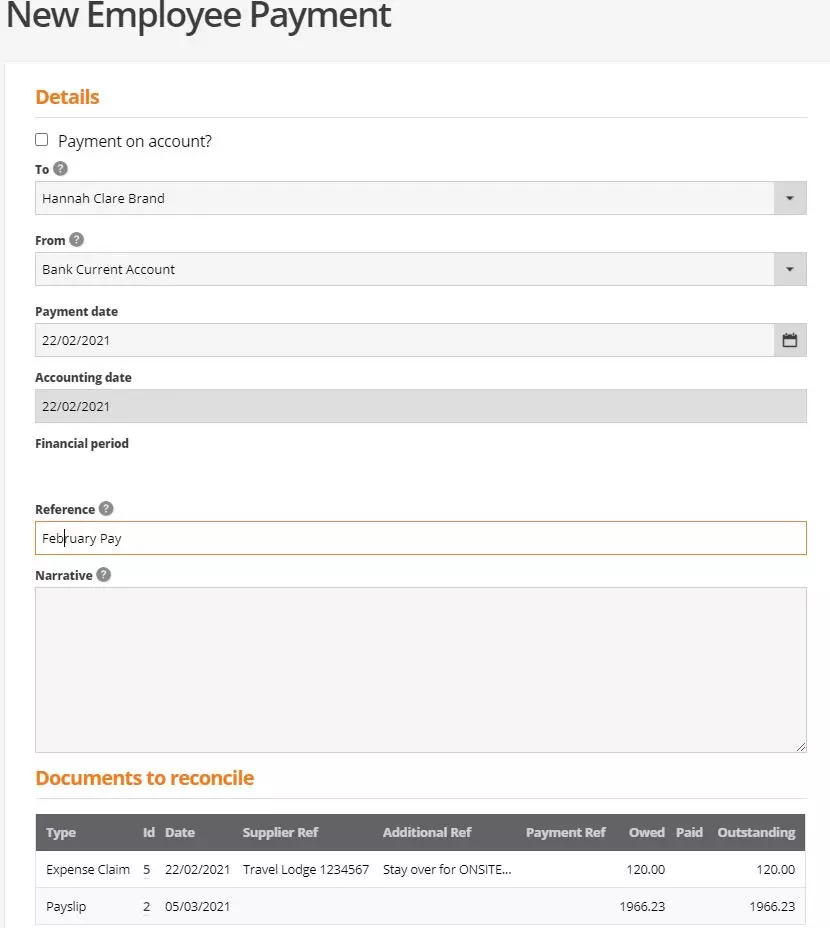
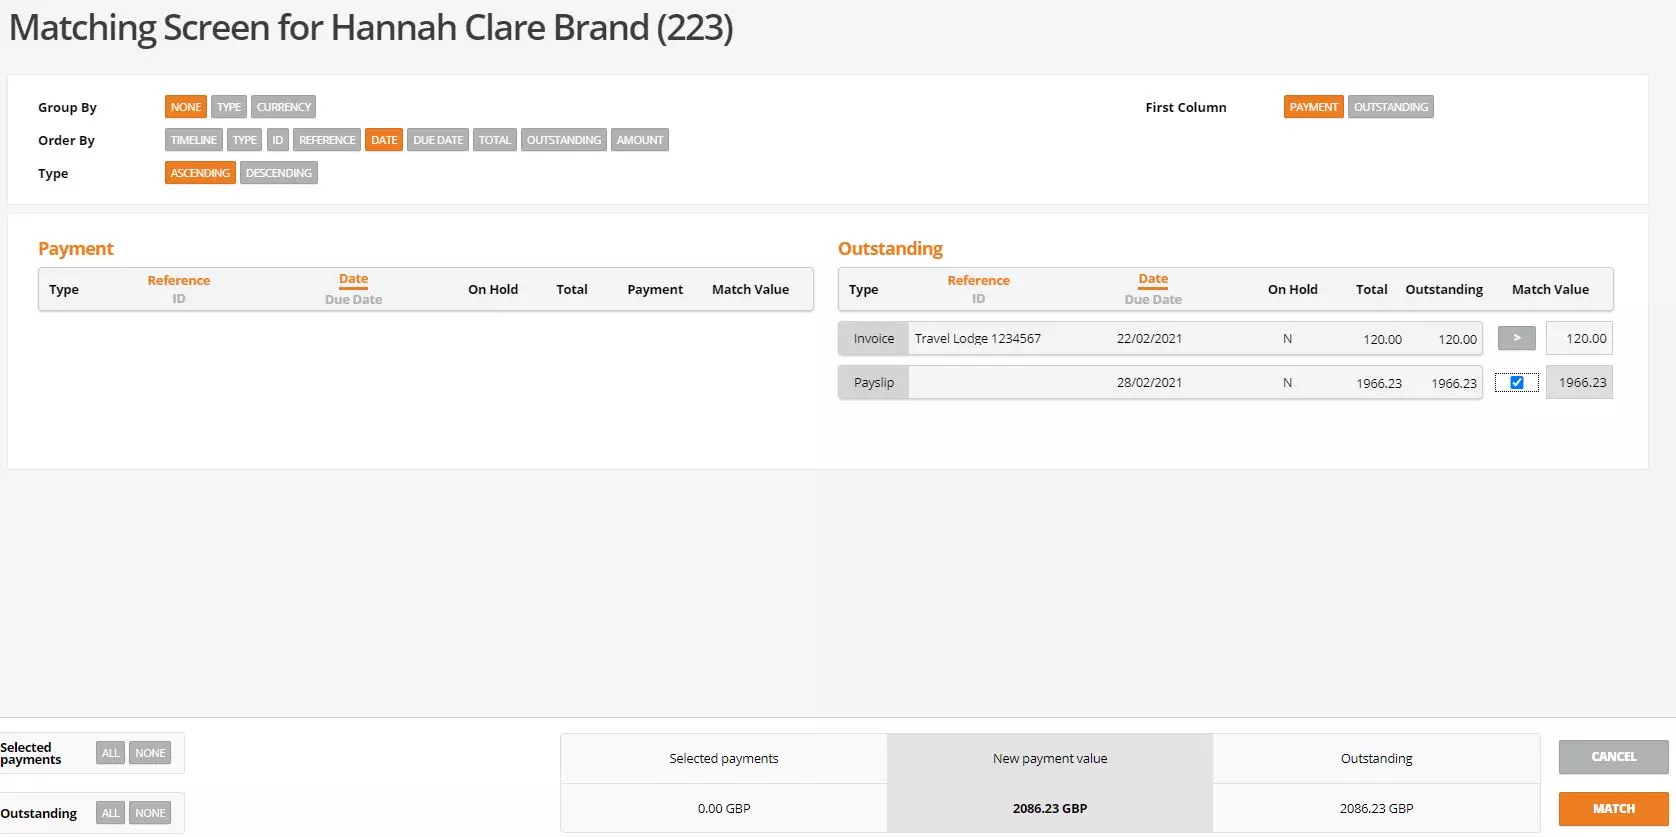
Expense Claims
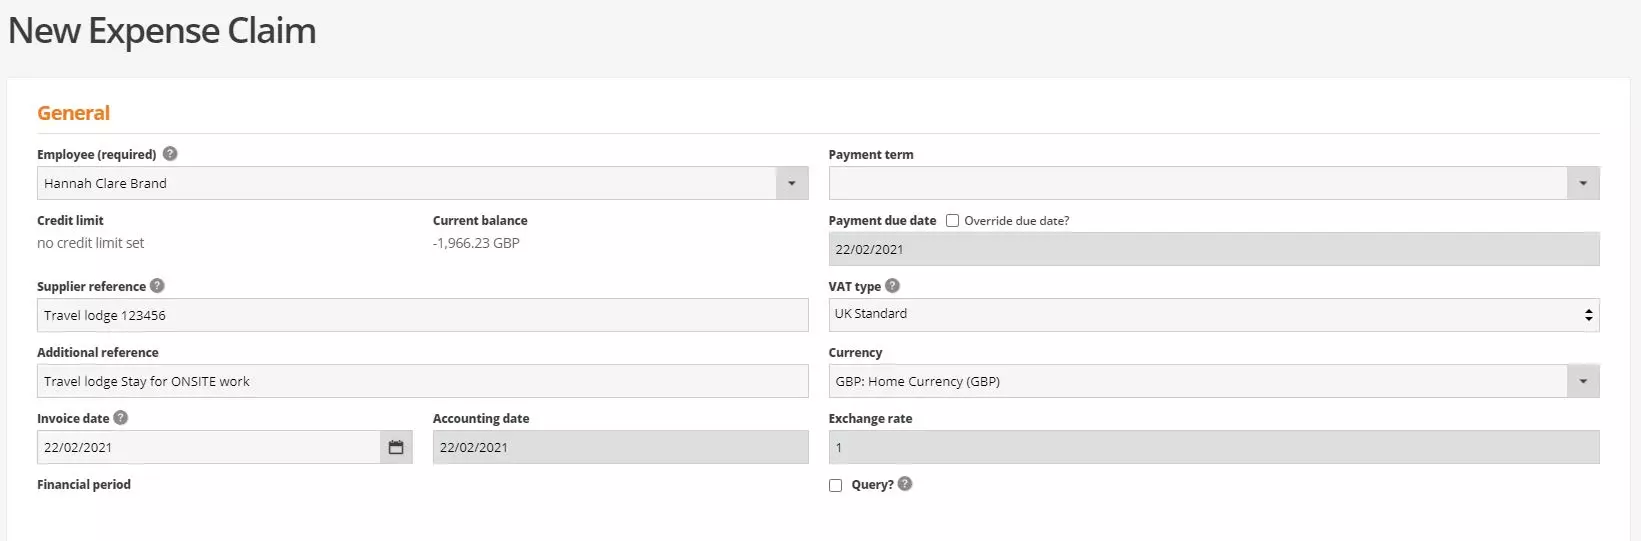
Navigate to employees > expense claim
Expense claims should be created to record employee expenses. This could be anything such as fuel, hotels, foods etc. To create a new expense claim for an employee select +new at the top of the expense claims screen. This will load the expense claim form which looks and works similar to a order / invoice screen. First select the employee for the claim along with recoding any other details such as a supplier refence, invoice date, currency etc.
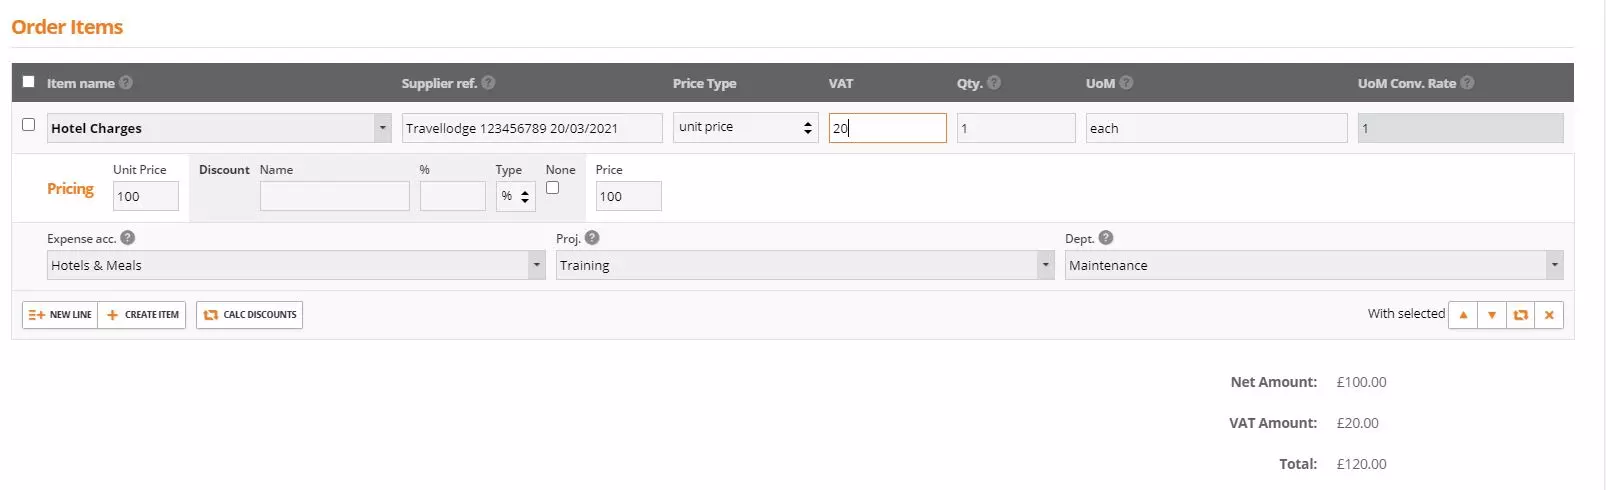
Under the order items section record the items the employee is claiming. These items MUST exist as either stock items, consumable item, or services items. Depending on the record set up some details will be prepopulated however can be amended. Confirm amu supplier item reference, VAT amounts, Qtys, UOM, price, expense account, project and department.
Finally record any notes relevant to the claim and select save. An expense claim document will display that can then be printed or saved.