Advanced Business Cloud Essentials – Beginners’ Guide
Chapter 5: Customer Accounts & Sales

Chapter 5: Customer Accounts & Sales

Customer Account Records

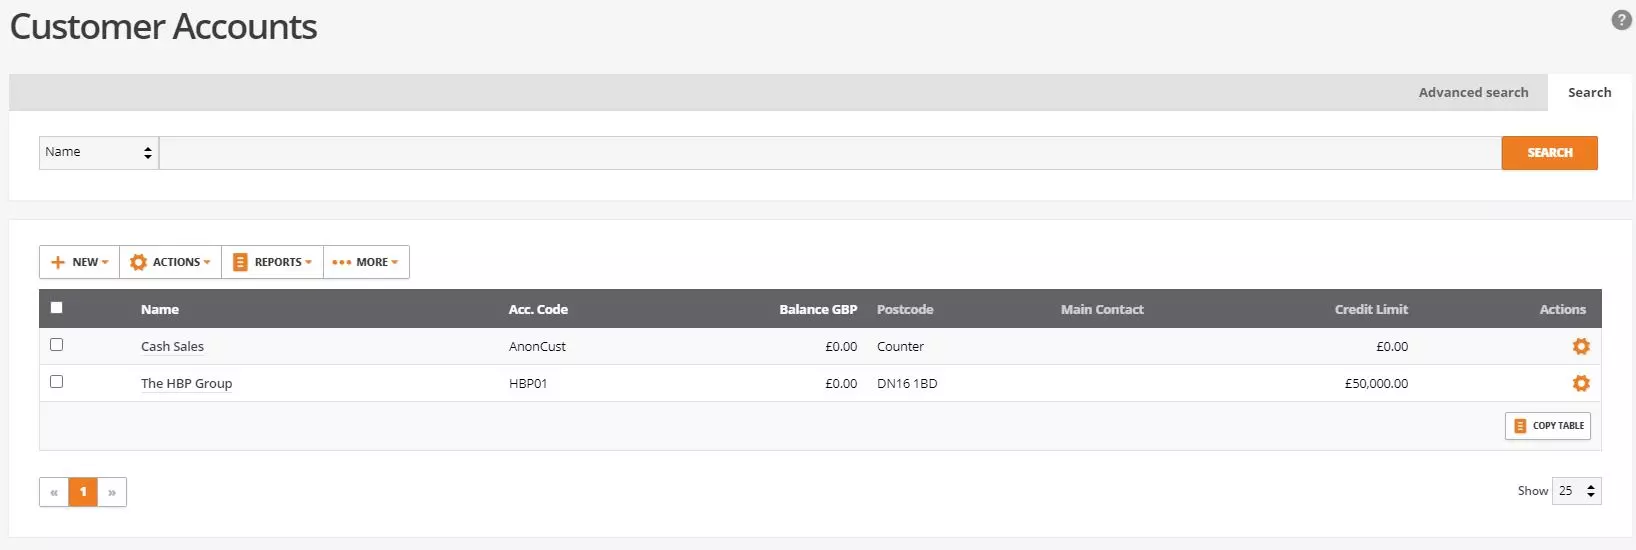
Navigate to Customers > Customer Accounts
All active customer accounts will display on the customer accounts screen. The search and advanced search filters can be used to reduce the number of accounts showing in the results table. As a quick overview, users can see the account name, code, balance, postcode, main contact information and credit limits.


Sales Screenshot


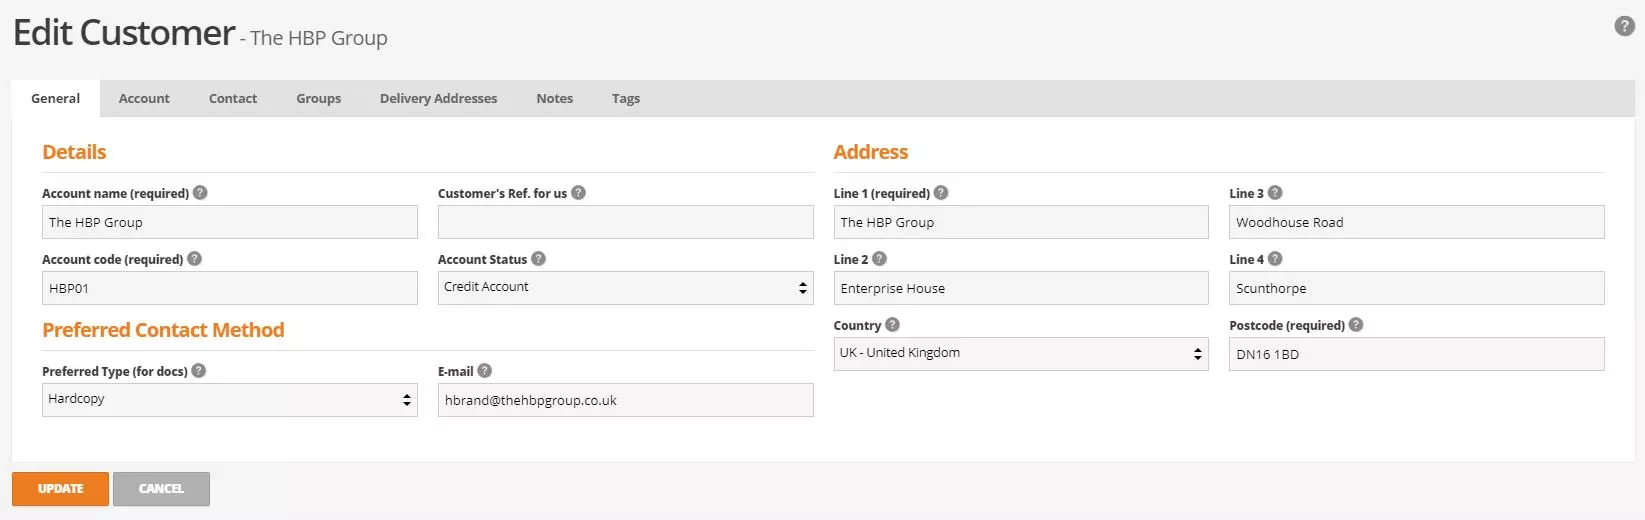
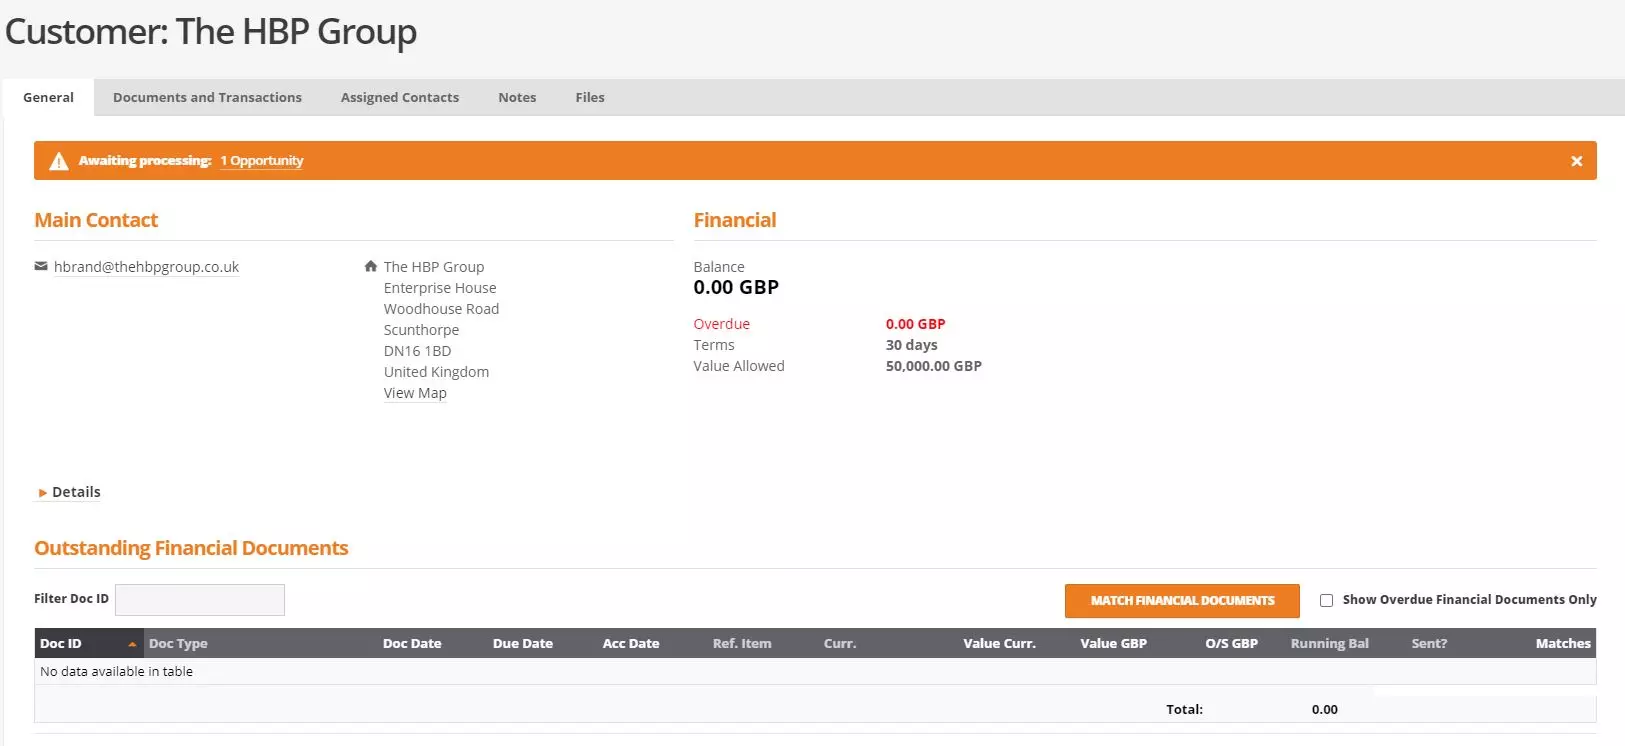
To view further information about the account, users can select actions then select show. This will display the account record. Across the top of the record there are 5 tabs – General, Documents and Transactions, Assigned Contacts, Notes and files. For simplicity, the general tab shows the main contact details along with a financial overview of the account followed by a breakdown of outstanding documents such as invoices, credit, payments, and receipts.


Sales Screenshot


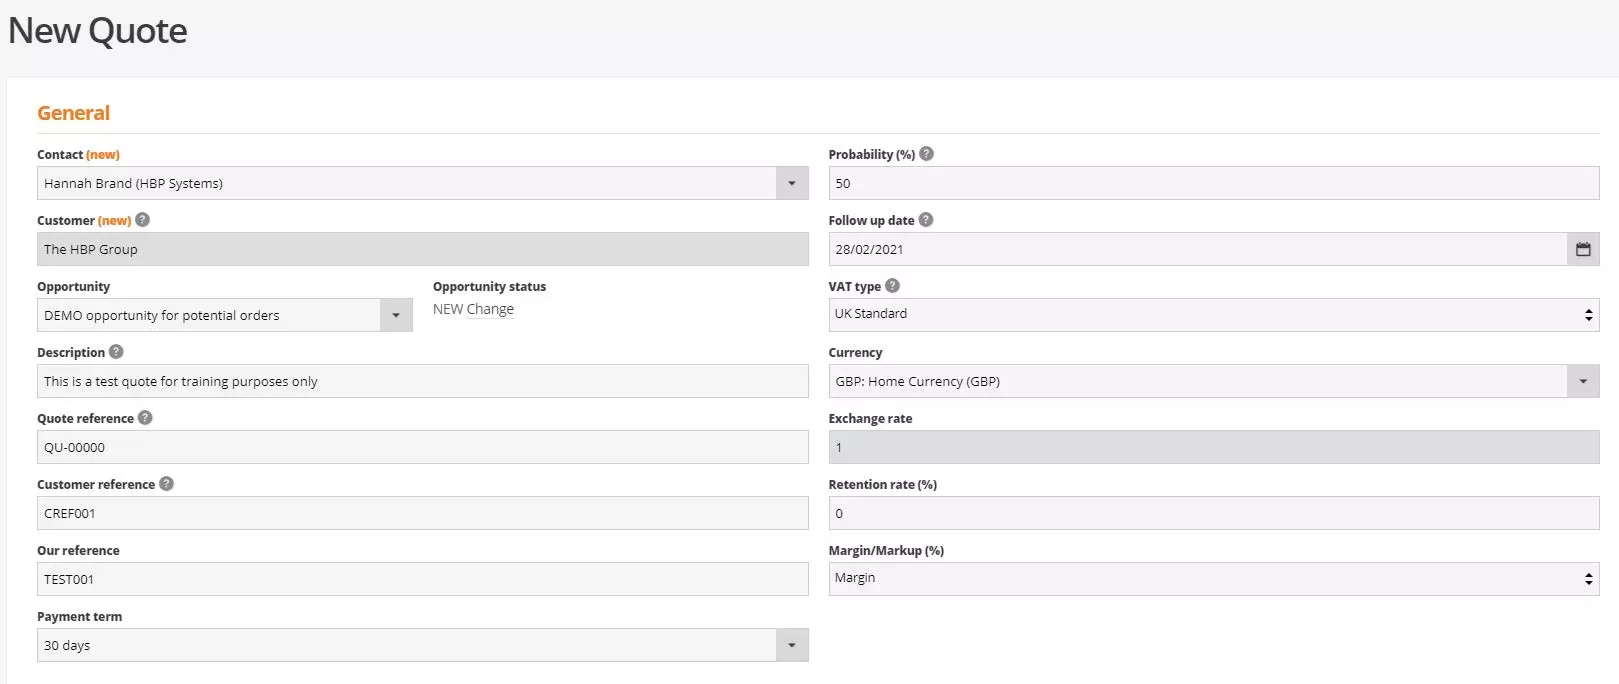
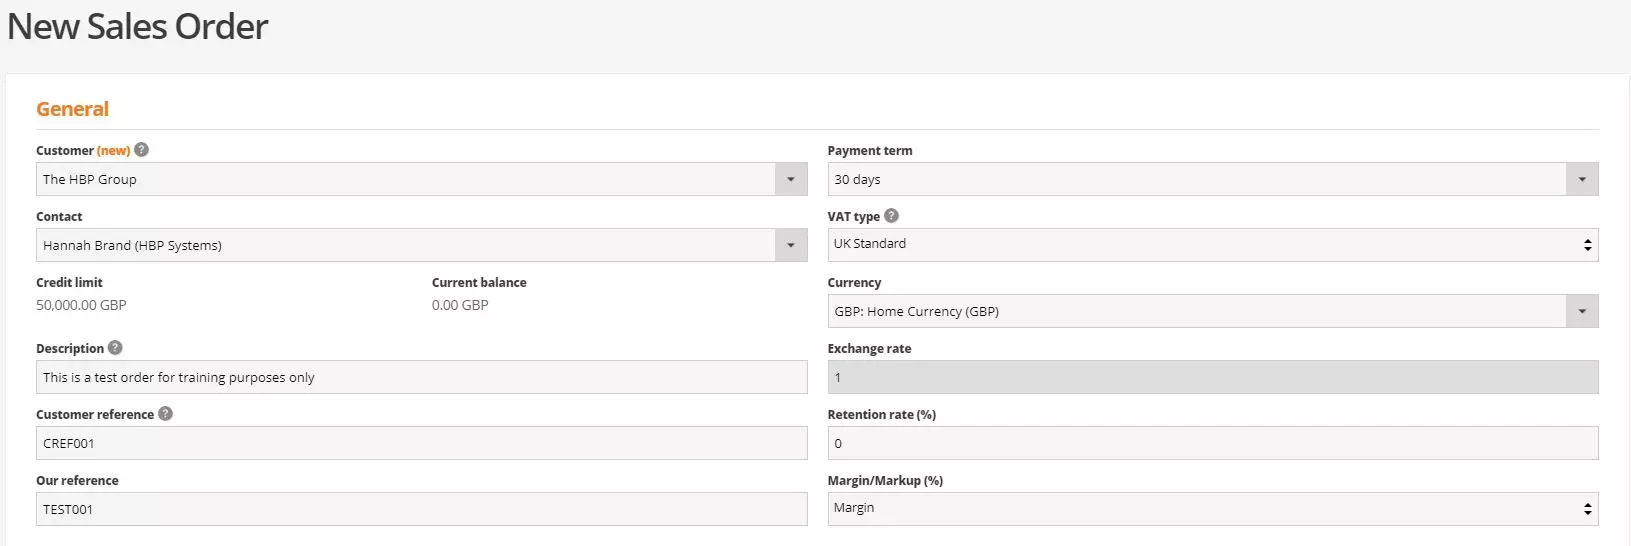
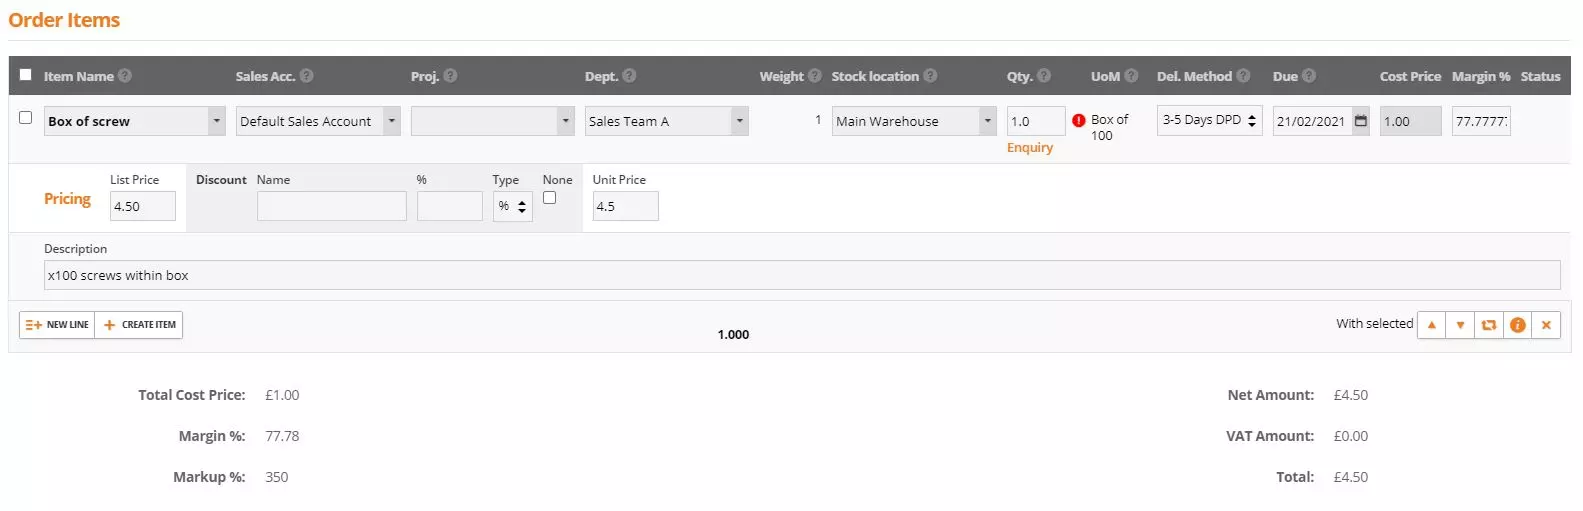
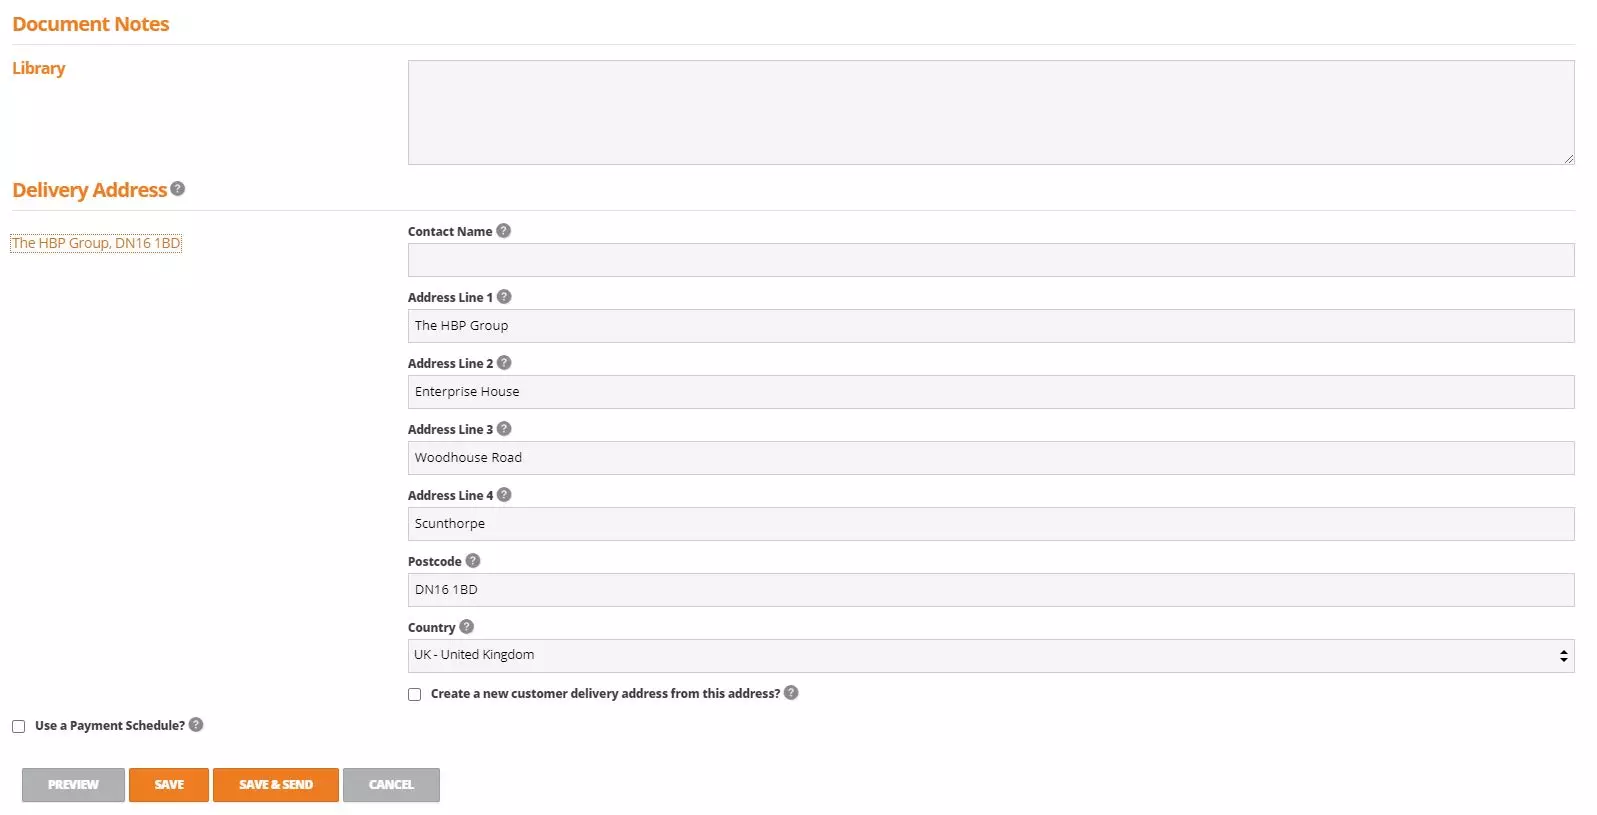
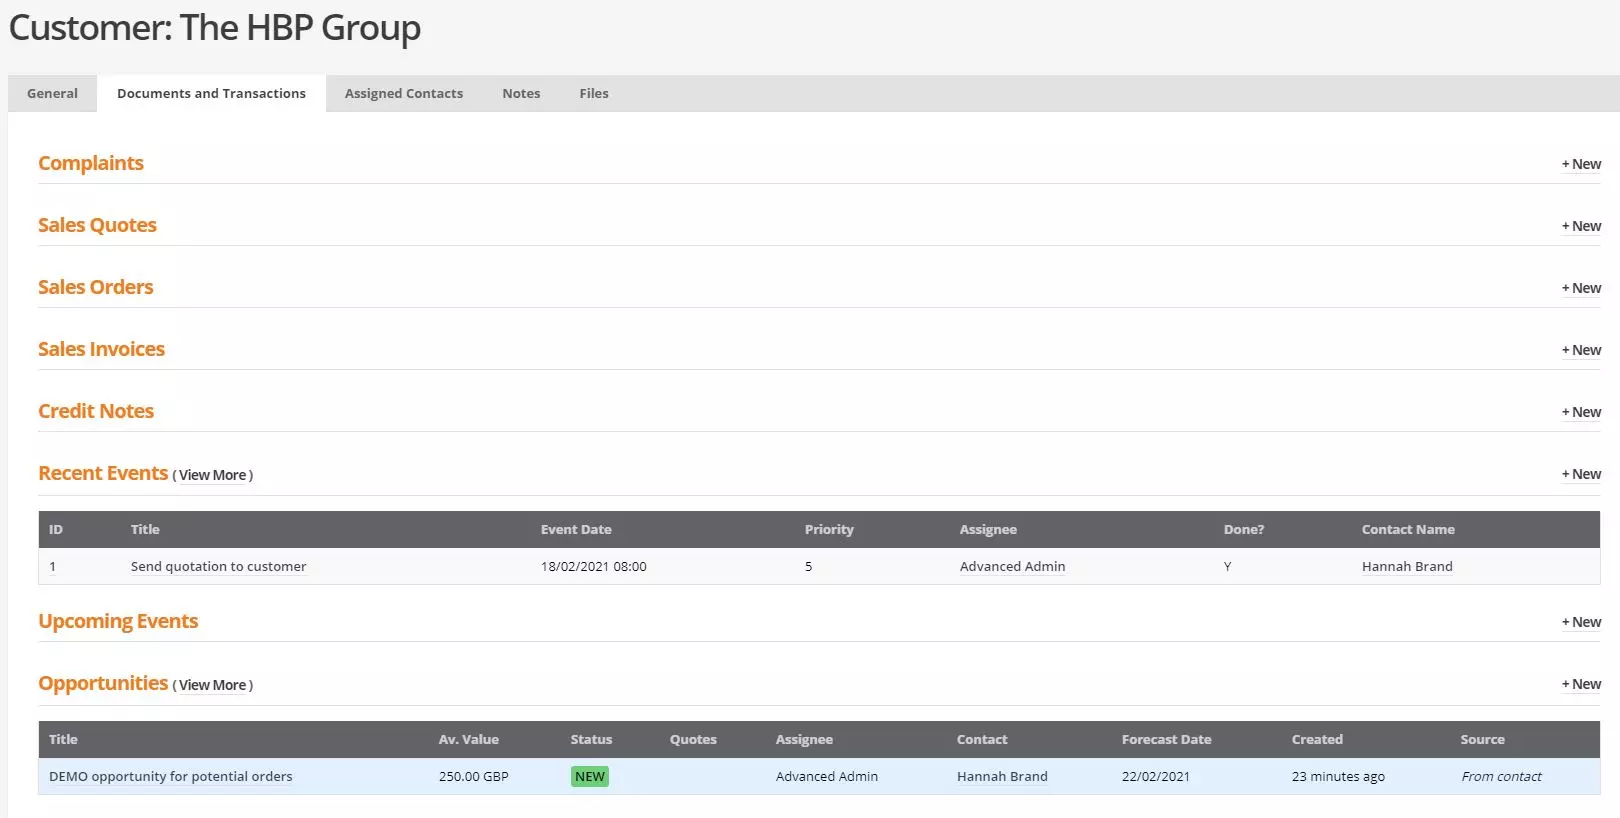
Under the documents and transactions tab users will find all historical records and transactions created for the selected account including complaints, quotes, orders, invoices, payments, etc. Further information regarding the historical data can be view selecting the ID number and new records can also be created from this screen select +new next to the relevant heading.


Sales Screenshot


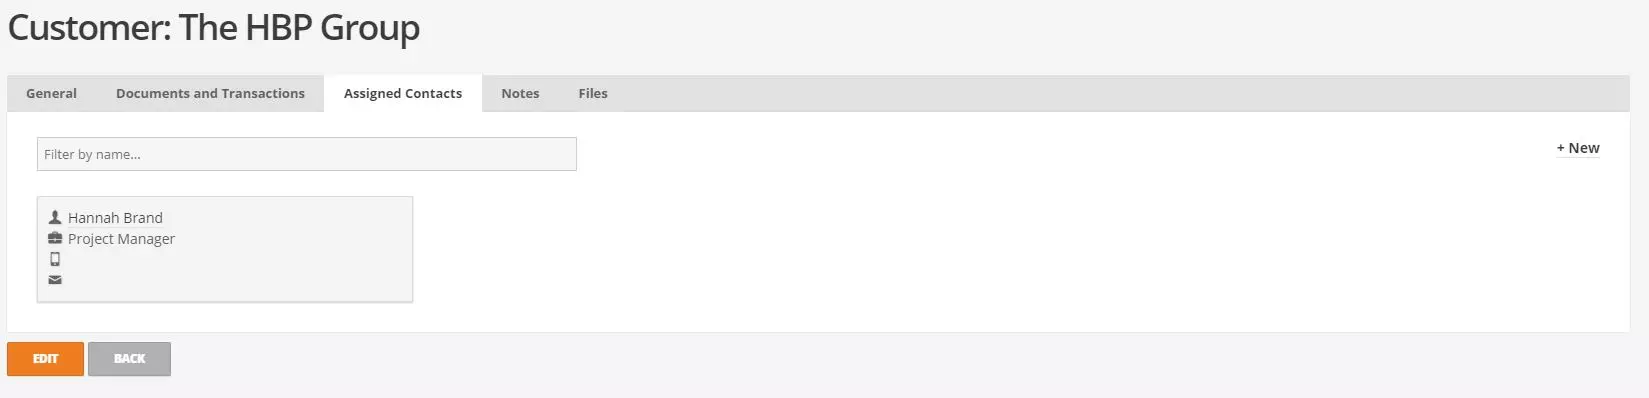
The assigned contacts tab will display all current contacts from the CRM module that are assigned to the main account. New contacts can be created selected the +new option in the top right of the screen. As standard, only the contact name, job title, mobile number and email will display however more information can be accessed by selecting the contact name which will open the contact record.


Sales Screenshot


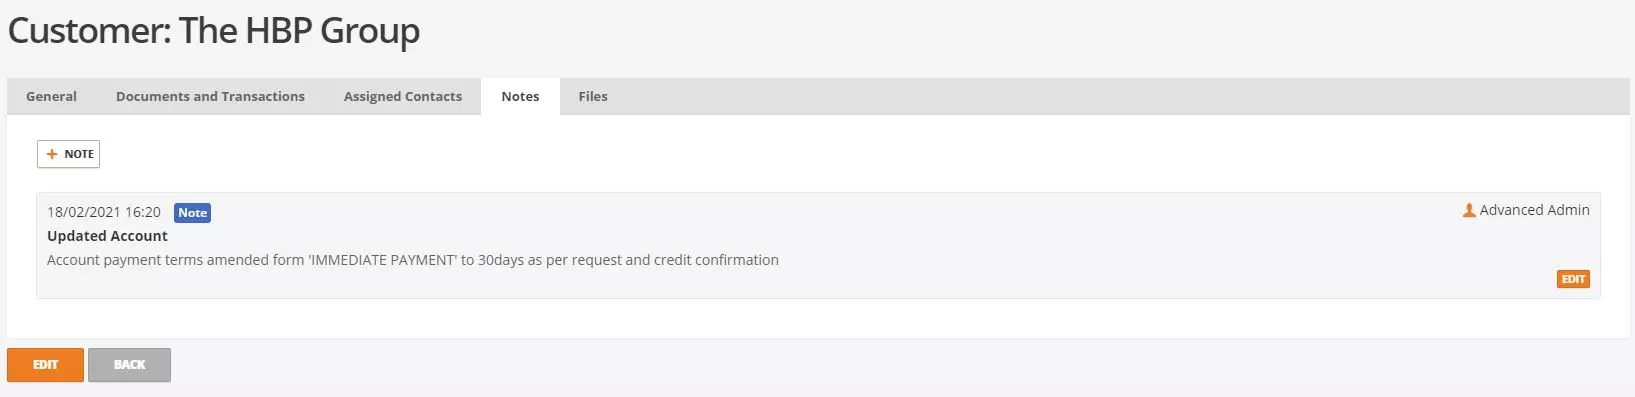
Under the notes tab users will see all pre-recorded notes against the account in date order, this will show the date created, title, notes and the user who created it. New notes can be added to the record selecting +note at the top of the screen. Notes should be added to accounts to record any actions that have taken place such as credit limit increases, amendments to account setting, calls, emails etc.


Sales Screenshot


The files tab will display a list of files that have been stored against the account and new files can be uploaded by browsing to the file and selecting upload. To use the ‘files’ feature your Business Cloud system must have a drop box account linked in the system settings.


Sales Screenshot


  • If there are any outstanding complaints or events for the account, these will display under the general tab at the top of the screen within a notification bar.
  • Assigned contacts can be selected on orders and invoices. All assigned contacts history will appear under the contact record as well as the assigned account.
  • Only one drop box can be set up for integration under the company settings
Tips-Image

New Customer Accounts

To create new customer accounts, navigate to the customer account screen and select +new at the top of the screen. This will open the account record for users to populate. Data is split across 7 tabs including General, Account, Contact, Groups, Delivery Addresses, Notes and Tags. Work through the record populating all known details for the supplier. Not all fields are required, however if populated will follow through the system for easing business process and better & more accurate reporting.

Some of the fields we advise to populate are:

  • Account status
  • Preferred contact method
  • VAT type
  • EU Country
  • Default sales account codes
  • Default projects and / or departments
  • Tags (free text fields to categories records together and can be filter on advanced search)


Sales Screenshot


Putting Accounts on hold & Closing Accounts: Once accounts have been created, they can never be deleted as they may have historical transactions associated to them. Although accounts cannot be deleted, they can be closed, meaning they will no longer show on the account screen by default and orders can no longer be created. To close an account, edit the account in question and set the account status to CLOSED If an account is in use however you do not want orders to be created due to high balances etc, then the account status can be set to ‘IN DISPUTE’ which will put the account on hold until changed.

Customer Groups: Created from the customer account screen under actions at the top and allow users to group accounts together and add to discount rules, pricelist, and other records.

Tips-Image

Sales Quote

Navigate to Customers > Sales Quotes
Quotes can be created in business cloud to send a documentation to customers outlining items and prices which can later be converted into a sales order making sales order processing much quicker as there is no need to re-enter details.

The quote form on screen is split into 4 sections, general, order items, document notes & delivery details. Under the general section users select the customer and / or contact they are raising the quote for. Once select the account details will display as per the selected account defaults which can be amended if required. Changes will only apply to the quote and will not update the account defaults. The system will prepopulate the quote reference following a numerical sequence. Opportunities must be created first before they can be linked to a sales quote. If linked, then the quote reference will display on the opportunity record.


Sales Screenshot


Items can be added to the quote under the order items section selecting ‘+new line’ and searching by stock code or name. Some of the item’s details will be prepopulated as per the item record defaults however can be amended ad hoc if required. This includes the sales account nominal for the transaction, project, department, qty, delivery methods, due date and margin if enabled in the system settings.


Sales Screenshot


Document notes can be added to the documentation by selecting the pre-set text from the document notes library, stored in the system settings, or by free typing into the notes fields. Delivery address details can then be entered manually under the delivery address section or selected from the available addresses to the left of the screen, populated from the customer account record.


Sales Screenshot


Once a quote has been created it will be stored on the sales quote screen and can be converted into a sales order.

Convert a quote into a sales order: To convert a quote, navigate to the sales quote screen and select actions against the quote in question and select confirm as order. The sales order form will load with all previously recorded data from the quote however details can be amended if required before saving.

Tips-Image

Sales Order

Navigate to customer > sales order

To create a sales order, select +New order at the top of the sales orders screen. This will load the sales order form, which is split into 4 sections, general, order items, notes & delivery details.

Under the general section users select the customer and / or contact they are raising the quote for. Once select the account details will display as per the selected account defaults which can be amended if required. Changes will only apply to the quote and will not update the account defaults. The system will prepopulate the quote reference following a numerical sequence. Opportunities must be created first before they can be linked to a sales quote. If linked, then the quote reference will display on the opportunity record.


Sales Screenshot


Items can be added to the order under the order items section selecting ‘+new line’ and searching by stock code or name. Some of the item’s details will be prepopulated as per the item record defaults however can be amended ad hoc if required. This includes the sales account nominal for the transaction, project, department, qty, delivery methods, due date and margin if enabled in the system settings.


Sales Screenshot


Document notes can be added to the documentation by selecting the pre-set text from the document notes library, stored in the system settings, or by free typing into the notes fields. Delivery address details can then be entered manually under the delivery address section or selected from the available addresses to the left of the screen, populated from the customer account record.


Sales Screenshot


Once sales orders are saved, documentation can be sent to customer and the orders will sit on the sales order screen waiting for the goods to be picked & dispatched

Delivery Methods & Service Charges: Against order lines there is a delivery method column where users can record the delivery method used, this is purely for reference only and will not have cost or price assigned to it. The methods shown in the drop down must be created first under customers > delivery methods. To charges for delivery or other services then service items, need to be added to the order items section. Service items can be created from the quote, order, or invoice screen as well under the stock & items screen.

Remove Items from an order: If items are added to quotes, order or invoices and need removing then open the record in question and select the check box against the item in question then select [X] to delete it.

Repeat Items on an order: If an item on a quote, order, or invoice needs to be repeated for a period this can be done using the repeat items feature. Select the check box against the item to be repeated then select [<>] to repeat. Confirm the start date, interval, and number of repetitions.

Tips-Image

Re Print & Send Order Documentation

Reprint or resend documentation is easy in business cloud, select actions against the quote, order, or invoice in question followed by print & send. The documentation for the record selected will display for users to confirm print or email along with the document template to be used.


Copy Sales Orders

To create a complete copy of a previous sales order, save time by selecting the check box against the order in question from the sales order screen then select actions at the top, followed by copy order. This will open the sales order form with all details including items, prices, address as per the order you have copied. Although details have been copied over the order can still be edited with items being added, removed, and edited.


Cancel Sales Orders

To cancel a sales order, select the check box against the order in question from the sales order screen then select actions at the top, followed by cancel order. This will display a sales order acknowledgment documentation than can be printed and / or emailed to customer to advise that it has been cancelled.


Ready for the next chapter? Head on to Chapter 6: Production Creation, Planning and Processing or view all chapters.

Not Already An Advanced Business Cloud Essentials User?

If you’re struggling with the challenges of running a manufacturing business and looking for solutions then Advanced Business Cloud Essential could be the answer and we even offer a free review of your business’ processes to understand which software system could help you.

Our advice and guidance is always free and we’re happy to talk to any business, no matter what stage of the thought process their going through. We have built our business on the values of trustworthiness and passion and will happily provide assistance to you, so if you want a chat, just get in touch.

Request A Free Review >
mrp and manufacturing software
Contact 0808 253 0490 info@thehbpgroup.co.uk
Loading…