Advanced Business Cloud Essentials – Beginners’ Guide
Chapter 8: After-Sales

Chapter 8: After-Sales

Customer complaints

Navigate to CRM > Complaints

CRM complaints can be to record a complaint received from a contact, customer, or supplier. The records allow users to keep trac of complaints and make sure the correct, necessary events have been completed to get a resolution. This will help avoid customers chasing and leaving bad reviews.

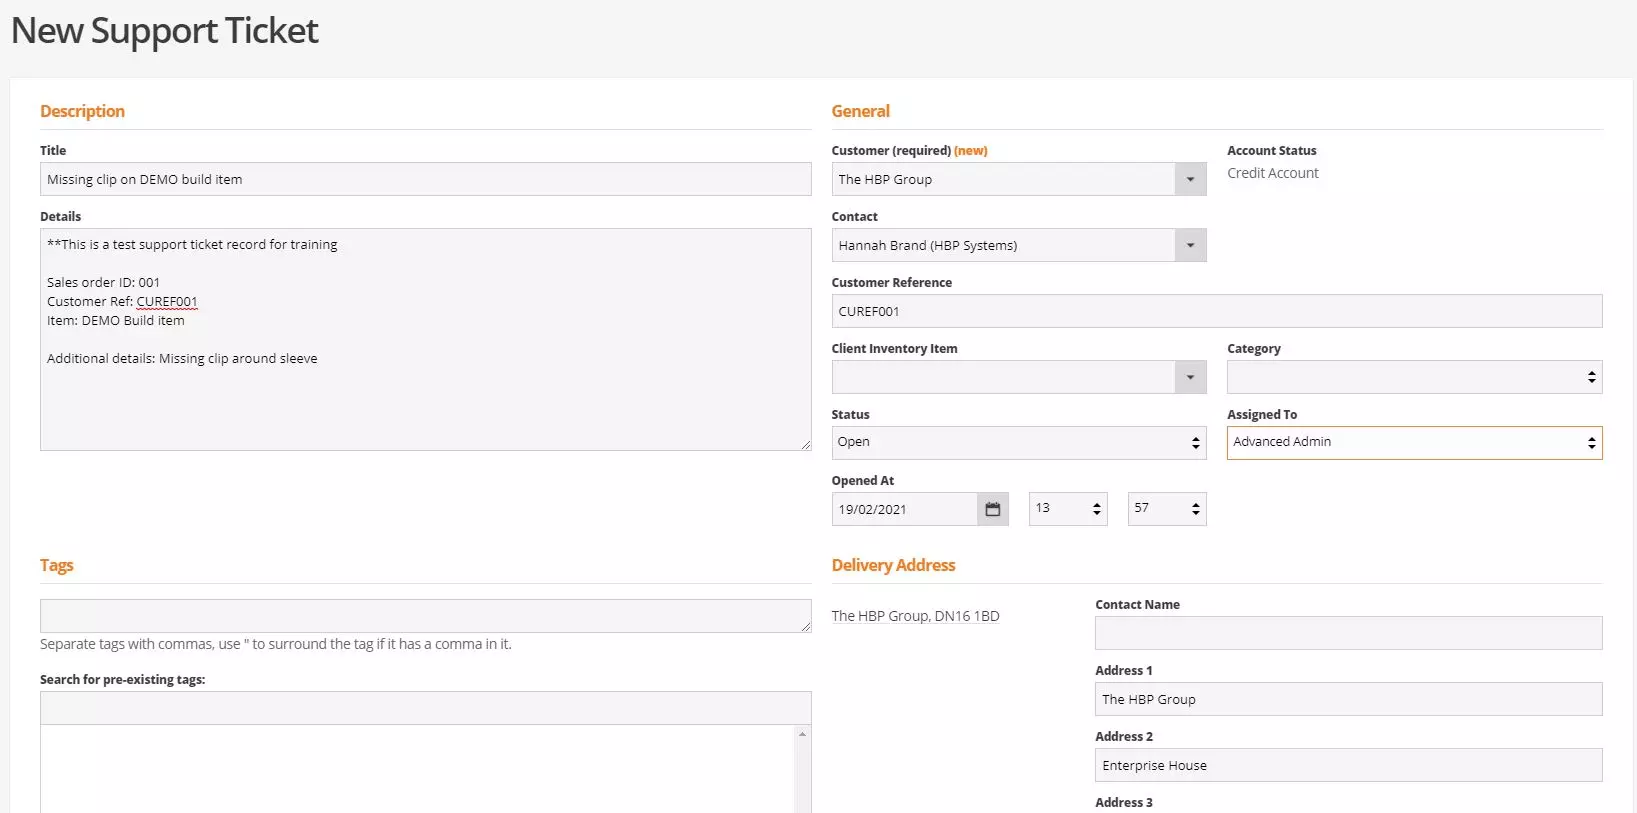
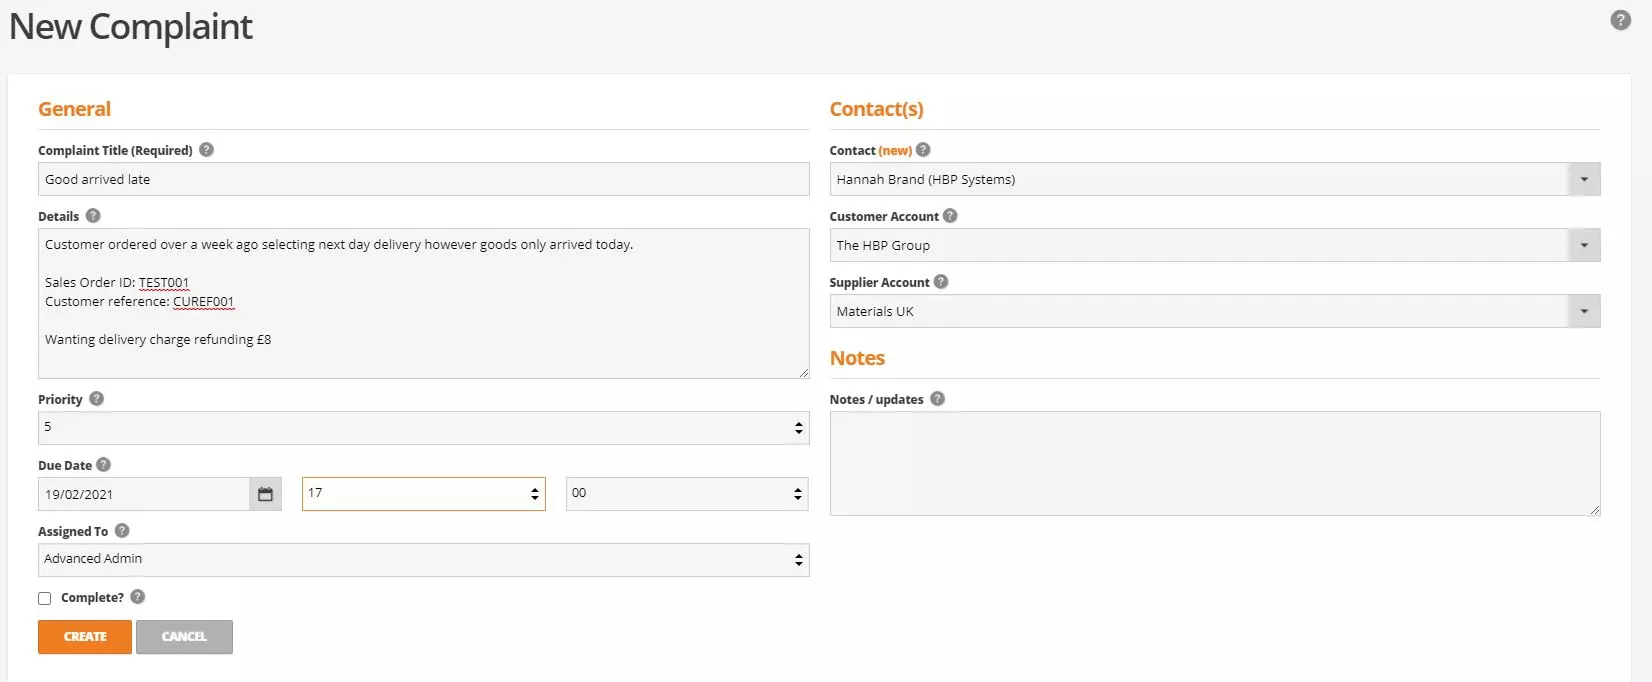
To create a new complaint, select +new at the top of the complaints screen. This will display the complaints record for users to populate with all known details. Not all fields are required however the more that is populated the easier dealing with the complaint later will be. We advise to set a due date and priority number for the complaint as this will influence a notification to display on user’s summary screens when complaints are due helping make sure complaints are actioned on time and never go overdue.


After-Sales Screenshot


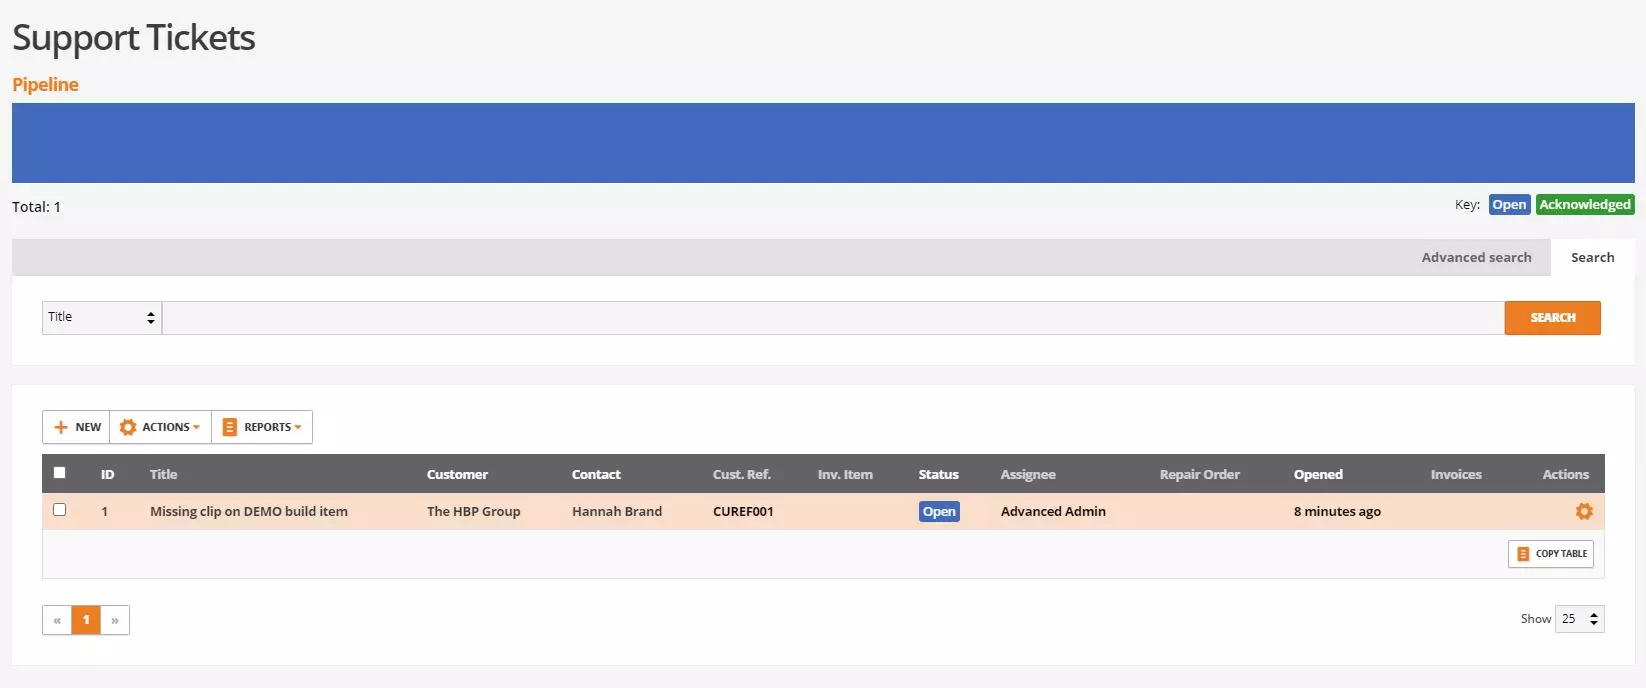
Once a complaint record has been created it will display on the complaints screen where users get an overview of the record and can then action the complaint. Live other screens in business cloud users can apply filters to show complaints relevant to them.


After-Sales Screenshot


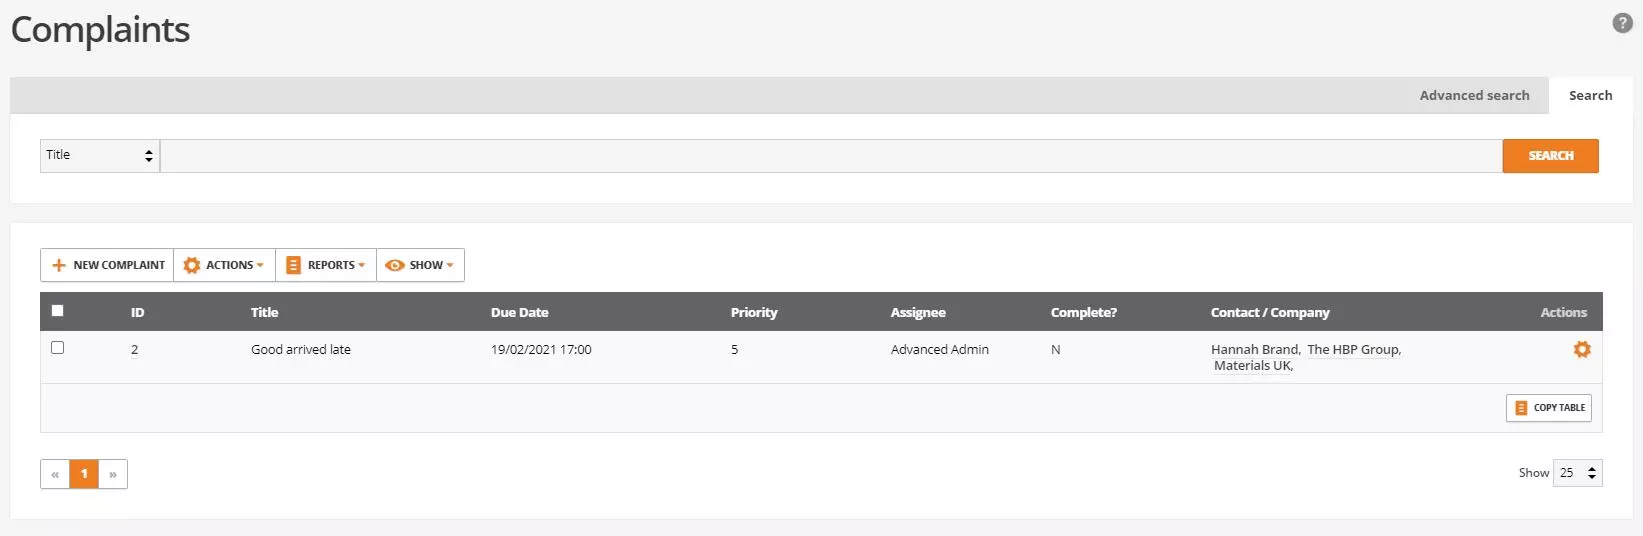
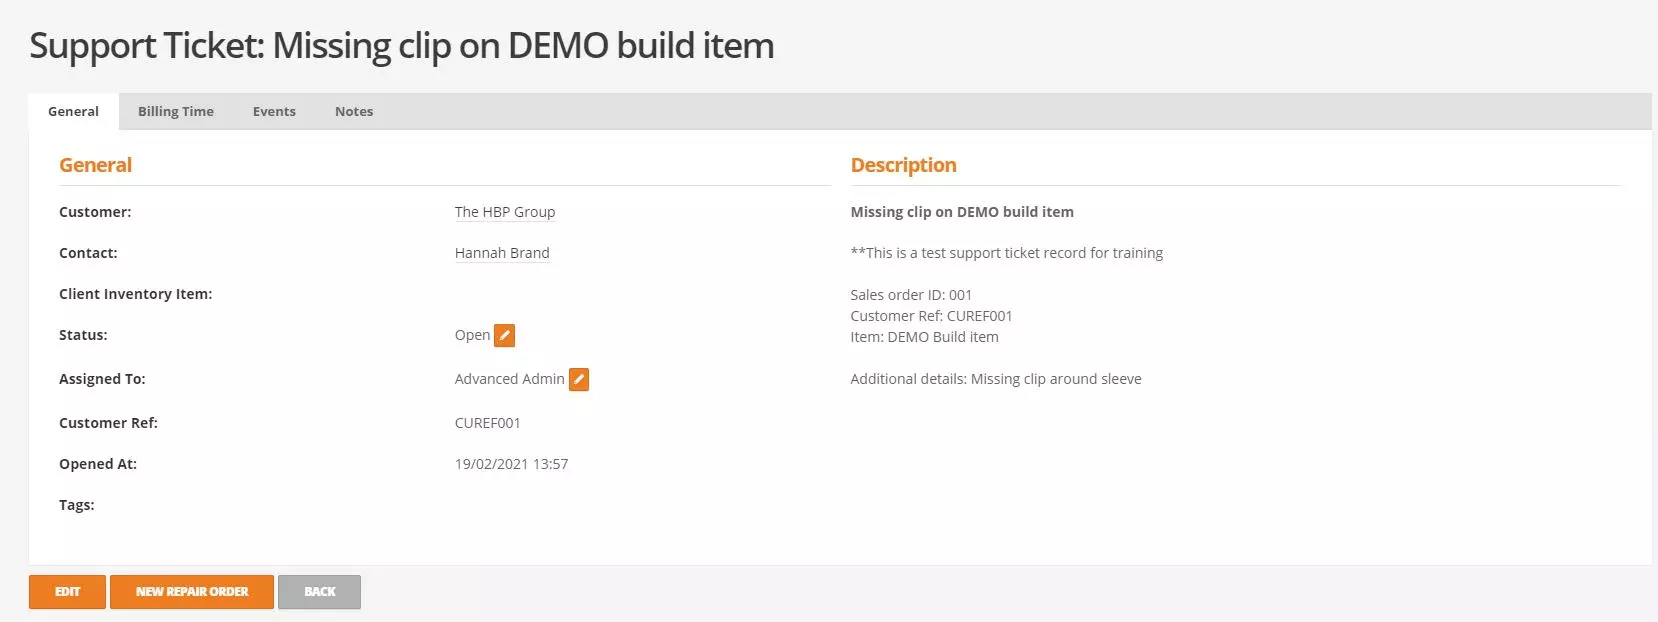
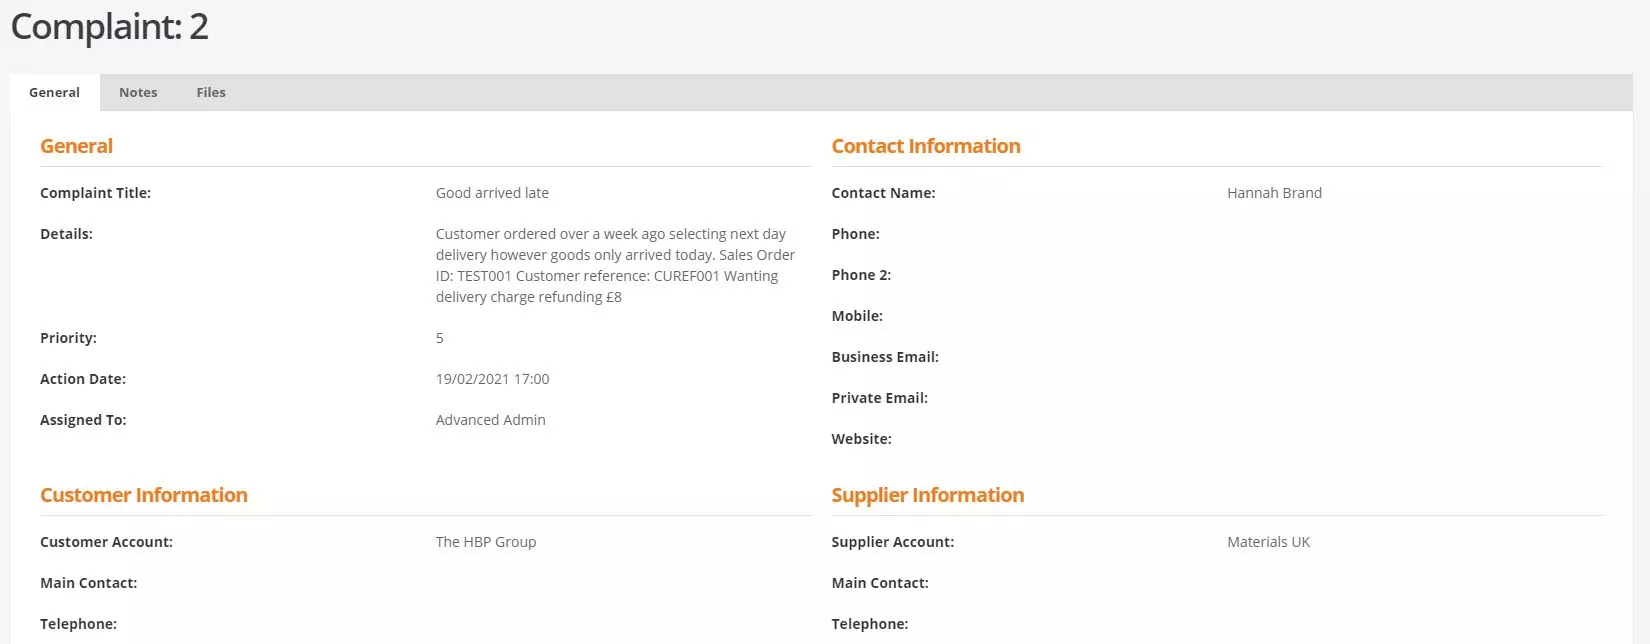
To view complaints, select actions against the record, followed by show. This will display the complaint and users can view all previously recorded details as well as editing, adding notes and uploading files if integrated with drobox. To complete complaints edit the record and tick the option ‘complete’


After-Sales Screenshot


Credit Notes

Credit notes can be created from a complaint selecting actions against the complaint record followed by raise credit or they can be created from the credits & refunds screen that sit under both the customer module and the supplier’s module. When creating new credit notes in business cloud you will be presented with 3 options to choose from; credit note from invoice, credit note and credit note & refund.

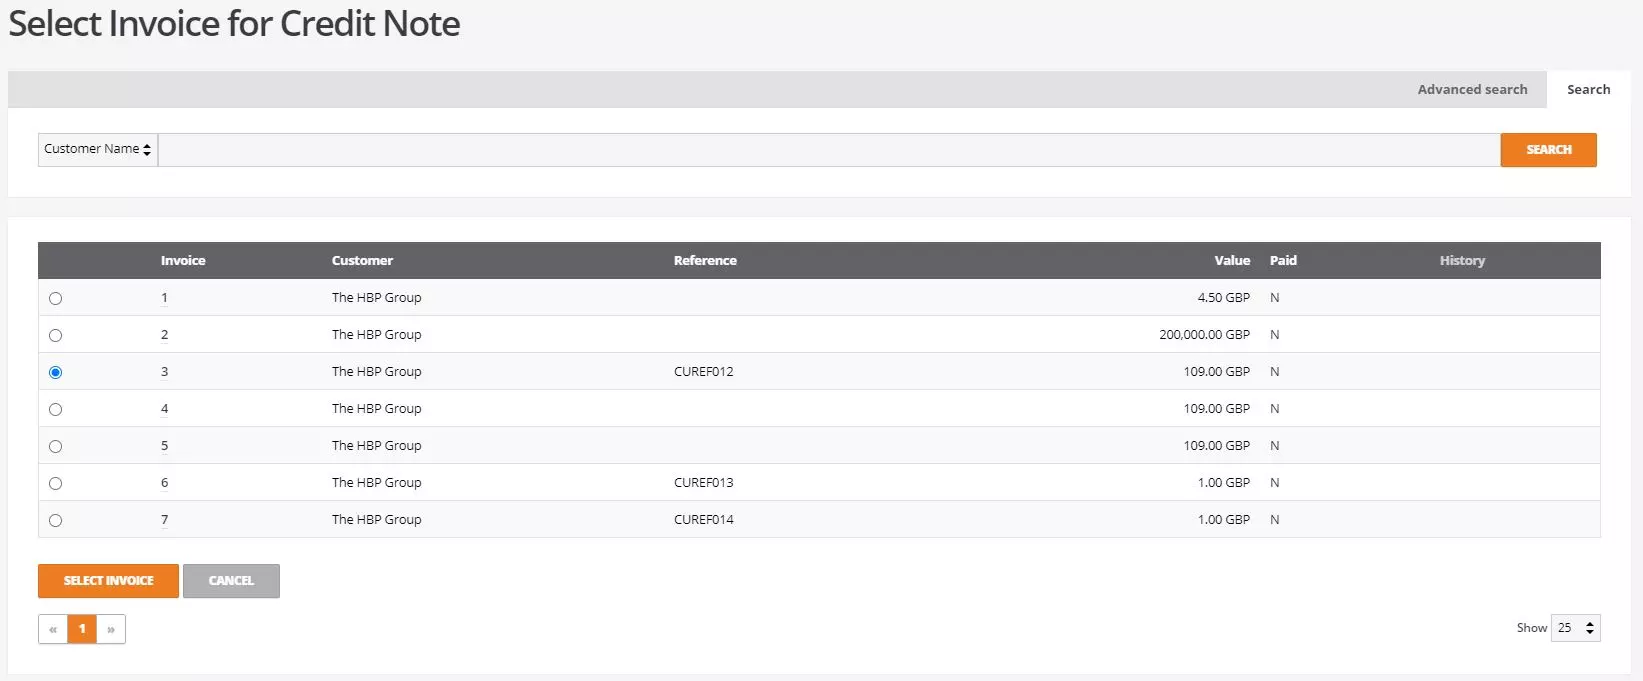
Credit note from invoice: when selecting this option users will first need to select the invoice in which the credit relates to.


After-Sales Screenshot


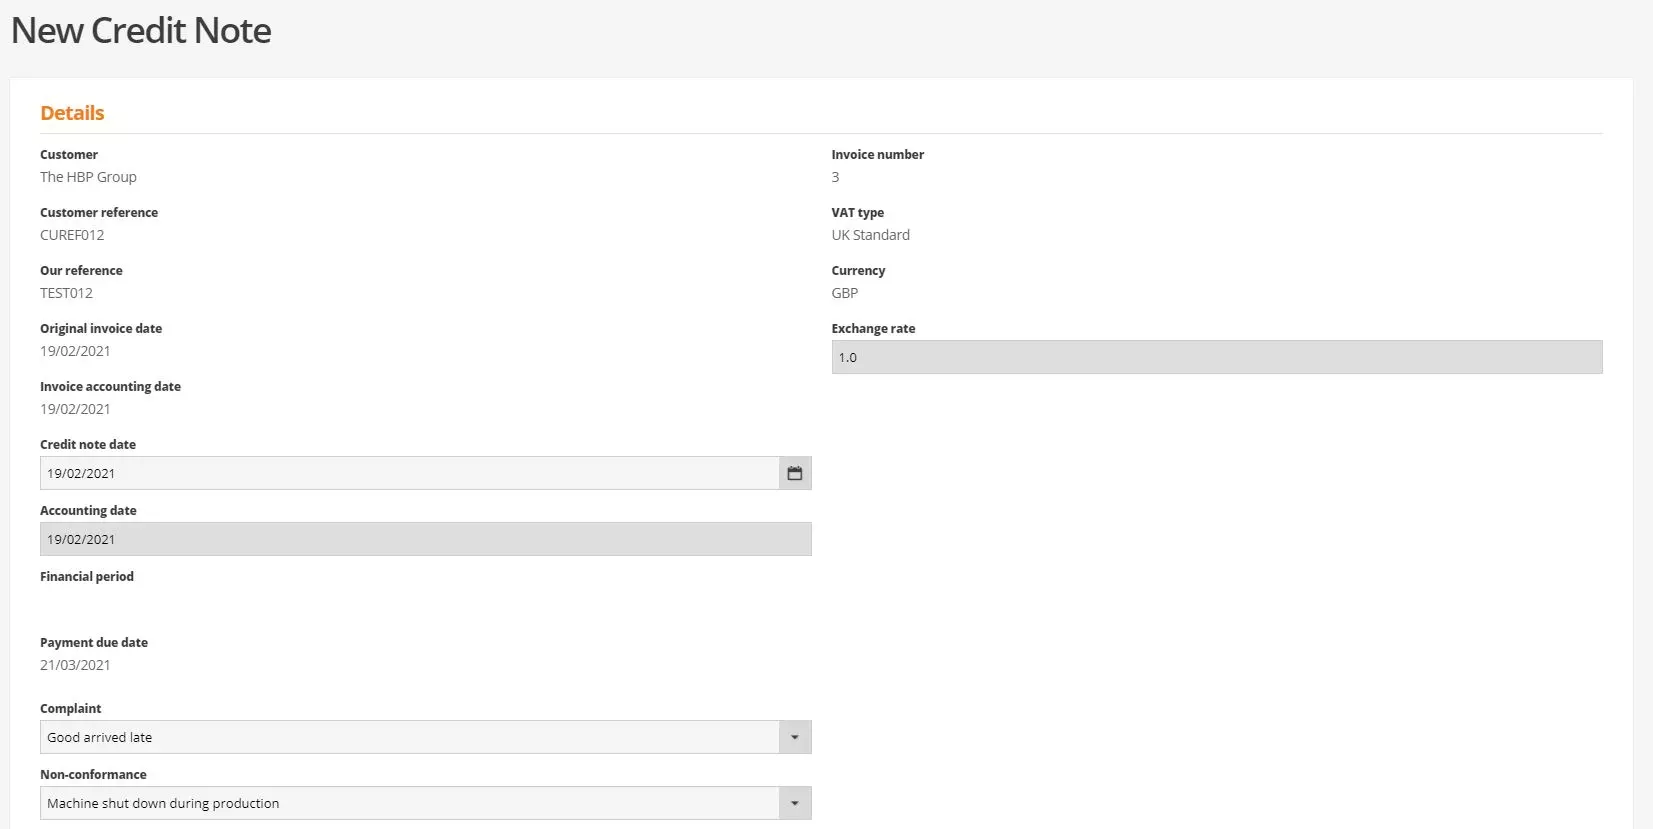
Once selected the credit note will display. The credit note is split into 3 sections, details, order items and document notes. As the credit is linked to an invoice all the details will be populated however users can amended the credit date, link it to a complaint and link to a non-conformance if required.


After-Sales Screenshot


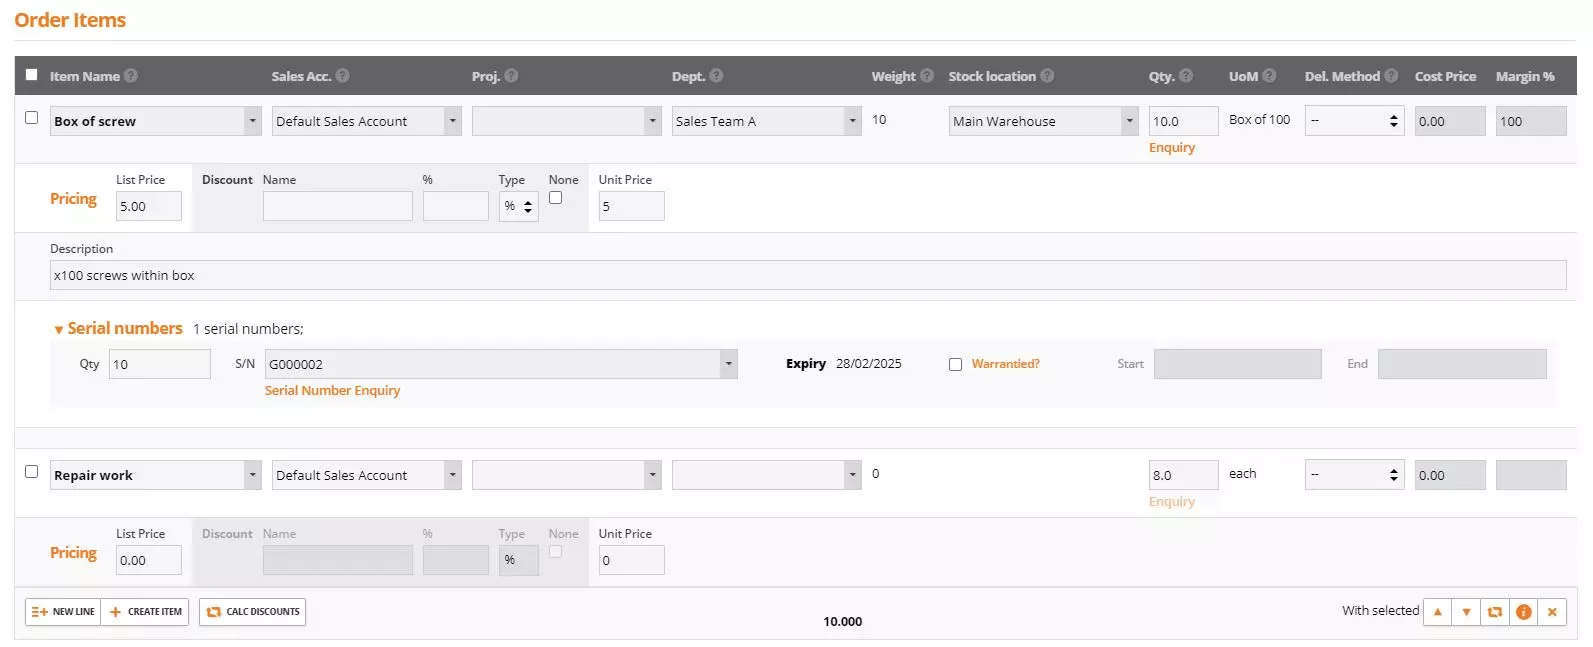
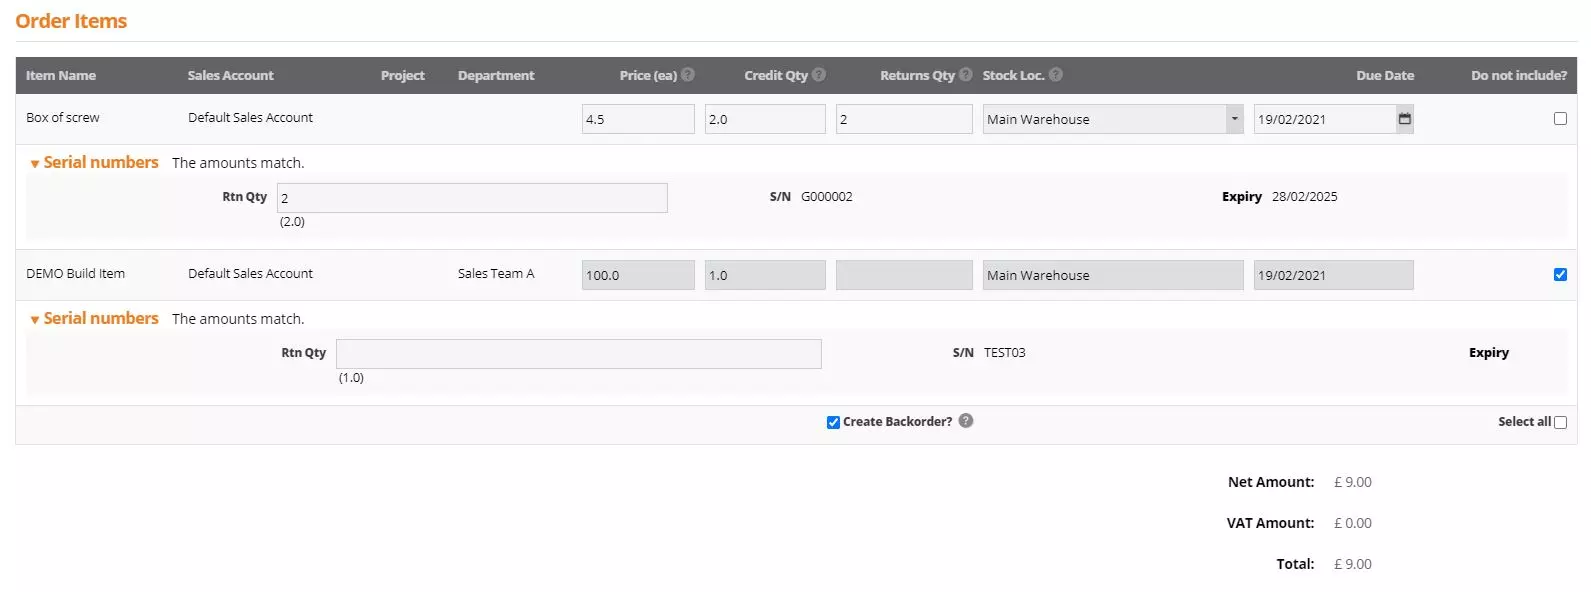
Within the order items section all invoiced item lines, prices, qtys and locations will display as per the invoice for users to confirm the credit price, credit qty, returns qty, stock and if required returning serial numbers. Credit lines MUST have a credit qty of x1 unless the ‘do not include’ option is enabled.


After-Sales Screenshot


Once the details and order items for the credit have been confirmed users can add notes to the credit and select to create a refund.

When saving the credit note If ‘refund’ is selected the receipts screen will show next otherwise the credit note document will show that can be printed and / or emailed and the credit will be added to the account.


After-Sales Screenshot


Credit note: when selecting this option users will be taken straight to the credit screen. As there is no link to an invoice, users will need to populate the details and order items for the credit manually. They can then save the credit adding it to the account or select to create a refund taking them to the receipts screen to record the refund.

Credit note & refund: when selecting this option users will first need to select the invoice in which the credit relates to and follow the standard credit note process. When saving the credit they will be taken to the receipts screen to record the refund.

  • If a serial traced item is added to the credit note users must confirm what serial number is being credited or returned.
  • Once the credit note is saved any stock adjustments will be made, and the customer account will be credited accordingly.

Support Tickets

Navigate to CRM > Support tickets
CRM support tickets work like opportunities in the sense that they are created to track and move records through different stages. Unlike opportunities, support tickets would be created post sale to support and / or repair a product sold. As with opportunities the support tickets screen shows a pipeline overview of support ticket split across different statuses. See our top tips on creating and editing statuses.

Within the results table all support tickets will show however users can filter this using the advanced search filters, so they are only looking at the tickets they need. From the main screen users can see the ID, title, customer, contact, reference, linked inventory items, status, linked repair order, created date and linked invoices for the ticket.


After-Sales Screenshot


Users can view tickets in detail selecting actions against the record followed by show. This will open the ticket showing all information previously recorded, along with any associated records that have been linked. Across the top of the record users can view and add billing time, events, and notes. Within the record they can also update the status and create repair orders to send to the warehouse.


After-Sales Screenshot


New Support Tickets: select +new at the top of the screen. The support ticket record will open to be populated with all known details. Not all fields are required, however the more data populated the more users will get out of the system when it comes to repair orders, billing and reporting later.


After-Sales Screenshot


Once the support ticket is saved it will display on the support tickets screen for users to update, edit and complete.


Repair Orders

Repair orders can be created in Business Cloud to send works orders to the warehouse. Repair orders work like works orders however are created for a service order item, so no final build is put into stock. Components and processes can still be recorded against the repair as they are with works orders and like build item, service item can have a bill of material recorded against them so the components and process prepopulated whenever a repair is created.

Create orders can be created from a support ticket record or from the works order screen. The setup is the same either way. First users will need to select the service item for the repair followed by the other repair details such as due date, customer, linked to support ticket, link to inventory item, stock location and repair location if required.


After-Sales Screenshot


If a bill of material has been recorded against the service item selected this will show under the components and processes however if not, components and processes can be added before created or added later by editing the repair.


After-Sales Screenshot


Once created the repair will display on the works order screen where warehouse / repair operatives can edit and complete the repair. The repair ID will display against the support ticket is linked and will show RED if incomplete and GREEN once complete


After-Sales Screenshot


Billing Repairs and Support Tickets

Billing can created for time spent on support tickets and components used for repair orders.

Support tickets billing time: Open the support ticket record and under the billing time tab add a service item to record the date, start, and end time for work carried out. This could be general service item such as ‘Repair work’ or ‘labour’ or they could be service items that go into much more detail.


After-Sales Screenshot


The billing screen will then display with details from the repair order and any billing time that has been recorded. Users can then select invoice against the required lines followed by invoice which will create an invoice for the customer and all items and prices will populate accordingly.

Repair order billing time: When completing a repair order, billing time can be recorded adding a service item along with he date, start, and end time.


After-Sales Screenshot


Invoice billing time on support tickets: Once billing has been recorded against a support ticket either from the billing time tab or against the linked repair order it can be invoiced to the customer. Select actions against the support ticket from the support tickets screen. This will open the support ticket billing screen for where users can see all billing time and components recorded. From here they can select which items they want to create an invoice for. If selecting invoice against the repair order both the components used and billing time will show.


After-Sales Screenshot


The invoice will be populated for the required customer account along with order items for service items and components used. Qty’s will show as per the components qty’s recorded on the repair order and for time the qty will show as per the hours recorded against the billing time lines. Prices will be populated as per the default items list price but can be amended if required.


After-Sales Screenshot


Invoice repair orders without support tickets: if repair orders have been created without a support ticket an invoice can still be created for the components and billing time recorded against the repair order when completed. Select actions against the repair order from the works order screen and select invoice. This will open the invoice screen prepopulated as per the repair order including components, qty’s and billing time with hours showing in the qty field.


After-Sales Screenshot


Ready for the next chapter? Head on to Chapter 9: Banking or view all chapters.

Not Already An Advanced Business Cloud Essentials User?

If you’re struggling with the challenges of running a manufacturing business and looking for solutions then Advanced Business Cloud Essential could be the answer and we even offer a free review of your business’ processes to understand which software system could help you.

Our advice and guidance is always free and we’re happy to talk to any business, no matter what stage of the thought process their going through. We have built our business on the values of trustworthiness and passion and will happily provide assistance to you, so if you want a chat, just get in touch.

Request A Free Review >
mrp and manufacturing software
Contact 0808 253 0490 info@thehbpgroup.co.uk
Loading…